Friday, February 24, 2017

Victor Nikiforov Flower Crown and Shirt

I'm crazy for the anime Yuri on Ice.  As I've probably said a million times already.  My love for this show--and so many of the characters--has no bounds.

Recently, I'm trying to get into causal cosplay.  It's a great way to relieve stress and anxiety at work.  A simple reminder that I'm in an outfit inspired by a show/book/movie I like does wonders for my mental health.

A few weeks ago, I accidentally got a stain on a cream colored shirt.  Since the shirt was ruined anyway, I had an idea to morph it into a Victor Nikiforov casual cosplay design.


Victor wears this outfit at a competition and it's beautiful!  I wanted to try to use this as inspiration for a casual shirt that I could wear to work.


I have experimented with using gel glue with bleach to get a design on a shirt, so I researched to see if it was possible with dying too.  In theory, it works.  So I took my white shirt, and used gel glue to etch out "feather" like shapes along the front of the shirt, sloping down to the left armpit.


At the top left, I did the inverse: I colored in the diamonds to remain white and left the connecting sections open to be dyed.


I used "denim blue" dye because it was what I had on hand.


You can see how the gel glue is holding strong!

The color looked so dark, so I freaked out and pulled it from soaking after ten minutes.  I bet the color would have turned out a lot brighter if I'd pushed through that fear and just trusted the package directions.

Now, with my adorable shirt ready, I HAD to have Victor's flower crown, or something similar.

I used blue clay to craft seven tiny roses.  I followed a tutorial on Pinterest, but my flowers still turned out kinda crappy. 


They were too big to turn into a necklace, so I figured a headband would hold them pretty well.  I hot glued them to a blue headband, and then added white beads in between.


And here's the final result:


I paired it with two bracelets: one blue and white snowflakes to represent Victor's Russian snow.  The second was a blue piglet--of course to represent Victor's love for his kobuta-chan, Katsuki Yuri!


~Buttons

Sunday, February 19, 2017

Scooby Doo Dress

We had Spirit Week at the elementary school where I work.  For movie star day, my coworkers and I discussed possible group ideas.  We settled on Scooby Doo.  I was Velma, so I wore an assortment of orange articles of clothing--even dying a pair of stockings red/orange.

But one of my coworkers asked if I could construct a Scooby Doo dress out of fleece.  I still have a ton of fleece left in my fabric stock, so I looked to see what I could do.

I only had scraps of this brownish color, so I had to get creative with my cutting.  Using a shirt as a pattern, I cut a front and back based on this shape.


I sewed them together, right side to right side, leaving openings at the neck, arms, and bottom hem.

From there, I used the rest of the fabric to cut out two skirt panels, both slightly wider than the bottom hem of the shirt.  I sewed the two panels together along both sides, then gathered the top to match the width of the shirt.  I sewed them together, right side to right side.  Very, very easy.


Next, I took black fleece and cut out Scooby Doo spots.  In canon, he has two spots on each shoulder, and a long spot along his back.  I tired to mimic this.


Finally, I used blue fleece to cut a belt, and added on a SD tag.


My coworker decided to wear the belt as a collar instead.  It looked so cute!


~Buttons

Sailor Moon Crescent Wand

In January, I was so excited to hear that the Sailor Moon R Movie was being released in theaters.  A friend and I bought tickets to see the Japanese subtitled version.

I wore my Sailor Moon casual cosplay outfit, but I wanted more accessories to go with it.  I must have gotten ride of my original Moon Rod (why did I do that!?!) so I decided to try my hand at crafting one of clay.

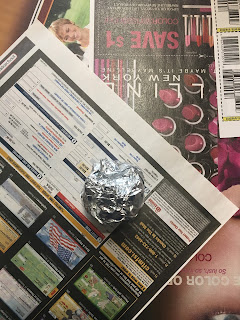
I started with a metal skewer which I covered in aluminum foil.


Next, I made a crescent shape,


And a ball for the Imperium Silver Crystal.


I forced the skewer through the crescent,


Then impaled the crystal atop.


I covered the stick with pink clay.


Then I began to cover the crescent with yellow.  I ran out of yellow, so I filled the rest in with white.


I cooked it according to package directions.


Finally, I painted it all and added lines to the Silver Crystal.


It turned out hideous!  But I completed it in an afternoon and had it ready for the movie that night.  So, I was pretty pleased!  More clay would have solved my problems.  Now I know for next time.


~Buttons

Milk Pocket Skirt

A few weeks ago I discovered a new fabric store called Bolts and More.  (It's right next to one of my favorite restaurants: New Mexican Grill.)

Anyway, I was delighted to see a new fabric store, so I eagerly went inside to explore.  They had an amazingly beautiful selection.  Of course, most were way out of my price range.  Still, I found a fat quarter in this pattern and nearly flipped:


I loved it so much!  But fat quarters were all I could afford at the time, so I envisioned a bulky brown skirt with milk bottle pockets.

Fast forward to last weekend.  While at Goodwill looking for some casual cosplay accessories, I found two perfect brown pillowcases ($0.99 for both!) and knew they were exactly what I needed to complete my bulky brown skirt with milk pockets.


I cut off both ends of the pillowcases, which gave me about a yard of fabric!  Not bad for $0.99!


I kept the width at the bottom and trimmed each top to half my waist measurement plus an inch seam allowance.


I sewed the pieces together, right side to right side.  Then I sewed up the bottom and top hems, and added an elastic band for the waist.

I cut my milk fat quarters into long rectangles and sewed them vertically onto the skirt.


I love this skirt!  It so comfy and beautiful!  Apparently it also makes me look like a pre-school teacher.  *LOL*


~Buttons