Monday, October 6, 2014

Princess Peach Dog Costume

While out shopping many months ago, Pockets and I saw blue jumpsuits at Kohl's.  I am not a jumpsuit kind of person, but as soon as I saw them, I though "MARIO and LUIGI!"  So, we bought them and wanted to turn them into Mario and Luigi costumes for Halloween, Comicon, etc.  It's actually kind of funny because she is younger, taller, and thinner than I am.  *lol*  A perfect fit!

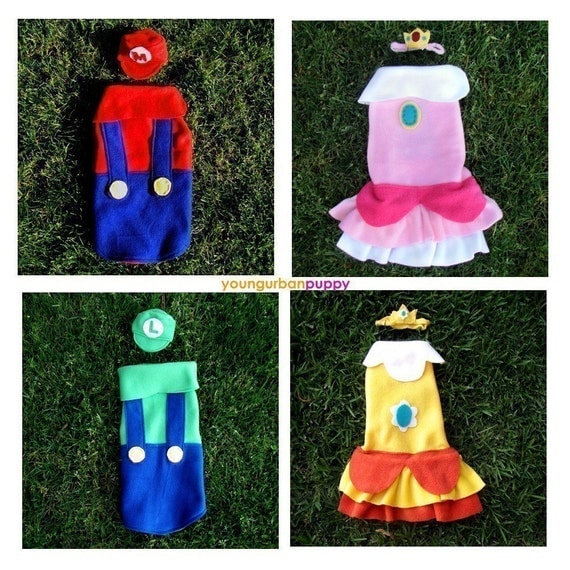
Anyway, I still need to make my Mario hat, and I'll try to get to it this week.  Still, wanting to stick with the theme, I decided to make Friday, my 7-year-old female Dachshund, Princess Peach!

I saw this outfit on Pinterest (you can buy it from Etsy), but I wanted to try my hand at making my own.

princess_peach_dog_costume.jpg
il_570xN.180178917.jpg

I chose fleece to work with because I already had a ton on hand (from my Pikmin hats over the summer) and because it's a very easy material to work with.  It doesn't fray, so you don't need to worry about hems.

First, I cut out the body, going to form a loop around Friday's neck, then down to her hips.

317360D5-0BCC-4016-9994-ABE59CC58076_zps

Friday is not the best model, so sometimes it was hard to get her to sit down.  Because of this, Mr. Smith--my 8-year-old male Dachshund--got to try on his sister's pretty princess outfit.

7C7ECEE8-D560-472C-8059-B9191C7F0B0E_zps

On the neck bands, I sewed two Velcro pieces--one inside, one outside--so the pieces would match up.

700BCE71-B3C0-4BCA-8D70-BE4DC76F9070_zps

CC621D6D-DB97-4821-9697-D6AC1360918F_zps

Next, I added a band around her waist to keep the garment in place.  I sewed a strip to each side.

D5791BD6-799C-4E8F-8365-A67E0F94454E_zps

Found where they met in the middle.

9077BA34-9921-42F2-8D84-2CFCFE800B1B_zps

Trimmed it.

7E2CE3AA-9C9B-4464-A18E-2908D641D89E_zps

Then sewed on Velcro pieces.

F30DABAB-40A0-4B69-8290-6AD6041FC4BE_zps

08CD22D0-520C-45A7-835B-19562CC1A4F2_zps 

Now, I had to make the neckline.  Peach has a dark pink collar at the top of her dress. For this, I bought four pieces of $0.34 felt at Joann.  I cut out the pieces to be elongated half circles.

BC2C9862-23CF-46A0-9BFC-4C87A3A8BA7D_zps

I sewed them both on with just a straight stitch.

6D481F49-38D9-4D69-9B9D-C9068814AC4B_zps

8E9359F4-4808-41E6-8009-4807909077A7_zps

Peach also has a jewel on her gown.   I cut it out of yellow and blue fleece.

67A1ED80-6EDA-4FA0-A134-CC89D59D0CAB_zps

But I saved adding it for later, because I used the iron-on method instead of sewing.

Now I had to make the skirt.  I took the same pink fleece and cut out a rectangle that was nearly twice the width of the body.

7BF69B0C-F960-4CEF-97C0-851978EF35A4_zps

I gathered one edge of the rectangle.  To do this with a sewing machine, you can use a ruffle foot.  I don't have that, so I had to gather it differently.  I started by straight stitching a seam all along one edge of the rectangle.  When you do this, you need to make sure the machine's stitch length is set to as long as it can go.

F0F919B7-06FA-4B23-A202-02AB3B2DF814_zps

Then, once your stitch is complete (and DON'T backstitch at the start and end of your stitch; the thread needs to be loose, not set in place), pull on one piece of the thread to make a small gathered area.

9FB15E15-C4AD-473D-B84F-3A400B1BF940_zps

Repeat this step, on both sides of the rectangle, moving the gathered portions towards the center of the material.  Once the larger rectangle is about the same width as the body, stop.

F4654299-8C98-494C-8024-8004F58718DD_zps

Pin the skirt to the body and sew!

EB33C893-B4E5-442A-9B77-FA1C0B94365D_zps 

Now the skirt ruffles.  The same sort of elongated half circles are used to create the skirt ruffle, but slightly bigger.  This was the hardest part of the outfit, getting these sewn on, on top of the gathered section.

B3EBCB7A-FB98-48E2-88A2-60E4D242D378_zps

Sew on with a straight stitch.

0FA93437-FD8F-44B4-B63E-1559FAFA42E5_zps

102A70CE-4B2B-41A6-8445-C0F579DAE230_zps
(notice my buttons rug under my sewing table?)  :D

For the crown, I wanted a 3D one to sit on top of her head, but I needed felt, and I didn't have that in yellow.  So I settled for a 2D flat piece.  I cut out the crown with three spikes, then sewed on two skinny, long threads to either side.  The threads could be tied under her chin to keep the crown in place.

C09FB47A-6DD9-414C-B8FD-7B848BC4A3EC_zps

C12AF002-50E0-43DA-9C8A-B83C47668368_zps

Now for ironing on the jewels.  I bought a bunch of iron on fabric (Pellon Peltex 2), with adhesive on both sides, so it fuses your materials together.  It's very helpful when dealing with tiny fabrics.

I took my blue and yellow jewel for the dress and put the adhesive on the blue oval.

434F955D-D5D0-4DC7-B8BC-CC4BD46E71CA_zps

I placed it on top of the yellow.

F84B8213-492F-4F3D-A7A0-C801952933E1_zps

Then, I covered the fabrics with a cotton buffer cloth (fleece will melt if it comes into contact with a hot iron).  Spray the buffer cloth with water, so it's damp, and iron.

F5A0F3AA-AC0A-45DB-A58D-9385824FAB4A_zps

Next, I flipped the jewel over, so the yellow side is face up.

24C2BDCD-EAC4-4988-A8D9-D45791275FF0_zps

I placed the buffer cloth back on top, dampened it, and ironed again.

With another piece of adhesive, I placed it on the dress, and the jewel on top.

575B0C54-4429-4C26-B104-A22F7540D98D_zps

I covered it with the damp buffer cloth, making sure to cover ALL the fleece!

CF29F6E9-9603-4457-9F8D-66ECE8CDBC62_zps

Iron.

C3DE3D19-0BA8-495E-A617-6545B6335570_zps

Flip over, and iron again.

Do the same for the jewels on the crown.  Peach has a red one (I used dark pink) in the middle, then blue ones to either side.  For a full crown, the jewels would just switch between red and blue.  I only needed three; one for each prong.

D64595CD-8234-4F58-84B8-62D8EADB019C_zps
(I wanted to use up my scraps.)

Put the adhesive side down on the crown.

C0C776B9-6A10-4F27-AAE1-98455E0CEB7D_zps

Iron with damp buffer cloth.  Flip over, and iron again.  And then you're all done!

CE27F3C3-608D-4F6E-AB0C-57A03FD35F51_zps

276D072B-1C5B-460F-BF9E-F2BB529C9AE4_zps

F6C7D543-D666-44A8-B561-F1504AB06315_zps

This was a VERY easy project.  It took about an hour, or an hour and a half, from start to finish.  The fleece made it super easy to cut and sew pieces together.  The hardest part was getting Friday to stay still long enough to try it on!

Maybe now I'll have to make Mr. Smith Bowser.  Hmmm...

~Buttons

Thursday, September 25, 2014

Yellow Ajah Tutorial: Calendula Creosote Salve

Pockets here guys with some exciting news!  I recently changed jobs. I'm working now for a great quaint tea shop that also has a burgeoning herb supply.  I've had an interest in herbal medicine since I was just a wee lass :)  Starting this job has really gotten me pumped up to start medicine making again.

Since its something I've made before I decided to make some herbal salve.  We've got a mosquito takeover at my house and I knew this would help.  Unfortunately, when I went to grab my recipe I couldn't find it!  :'( Alas, I turned to pinterest, and it didn't fail.  Calendula salve is a very popular herbal remedy but I wanted to add the creosote since it's such a great anti-bacterial and it smells FANTASTIC.  I started with this recipe and adapted it to my needs.

First it required a bit of math on my part.  Herb shops don't sell by the cup. When I weighed it at home 1/2 a cup turned out to be about 1/4 of an ounce, so if you get an ounce you'll definitely have extras.

Materials:

1 part Calendula (1/4 oz)
1 part Creosote (sometimes called Chaparral) Larrea Tridentata (1/4 oz)
2 parts Grapeseed oil (1 cup)

Beeswax (1 oz)
Cheesecloth
Bamboo Skewer
Salve Jars
Crockpot
Kitchen Scale

Directions:

Warning: I really did not take pics this time around.  Sorry.  :(

This is really a very simple process.  Weigh out your herbs and throw them in the crockpot.  I got a tiny Little Dipper crockpot at Big Lots for $10.  It worked perfectly.


Cover the herbs in the oil.  My pot didn't have a temp setting so I just plugged it in, put the lid on and left it.  I checked it about every 30 minutes and stirred it with a bamboo skewer.  I let it run for about 3 hours.  In my head I thought I remembered the teacher saying you could tell it was done when the herbs start to lose their color.  I couldn't find anything else that said this so don't quote me on that.  The herbs did start to look less vibrant after three hours so I was ready to go.

I used a slotted spoon to get most of the herbs out of the crockpot and put them on cheesecloth over a measuring cup.  Once most of the plant matter was out I upended the rest of it over the measuring cup (the crockpot doesn't come apart. Use oven mitts!!)

Once most of the oil had seeped through the cheesecloth I put the oil back in the crockpot.

This next bit involves a bit of personal preference.  Add your beeswax to the crockpot in small increments and let it melt.  Take your skewer, get a bit of oil on it and let a drop fall into the lid of your salve jar.  Wait a few minutes for it to dry and you can test the consistency of your salve.  I prefer mine a bit more solid since Arizona is hot and I don't want it to melt easily.  I used my entire ounce of beeswax but you don't have to.  I did about half a dozen test drops before I realized I only had a tiny bit of beeswax left and just decided to use it.

Once all your beeswax has melted and you've reached the consistency you want grab your jars.  Wash them thoroughly and dry them even more so.  You don't want any moisture left in your jars or it can make the salve spoil more quickly.

I used a small measuring spoon to transfer the salve from the pot to their jars.  Just fill to the top and leave them to sit and cool down.  This batch made a bit more than I had expected, I got two 2 oz jars and four 1 oz jars filled.  I let the leftover cool in the crockpot and scooped it into some stray empty altoid tins I had laying around the house.


I LOVE this salve.  It certainly helps with my mosquito bites and with a dog in the house, it seems like I'm always finding scrapes and scratches to use it on.

The only thing I wish I would have done differently is switching out dried Creosote for fresh.  It grows all over the place here in Phoenix and is very easily accessible.  Because the moisture content of Creosote is so low it's one you can use fresh.  The fresh plant adds a much stronger smell than the dried leaf did.  So if you like the smell of Creosote (a lot of people don't lol) use fresh if you can.

Hope you guys like the salve.  Have you ever made any herbal remedies?

~Pockets!  <3

P.S.  Why yes I did wear my Yellow Ajah shirt when I made this and felt like a total bad ass.  It's the small things in life...  :D


Tuesday, September 16, 2014

Panel Skirt Tutorial

I found a beautiful fabric while shopping with Pockets a few weeks ago, and bought it to make a skirt.  I thought it would fit well with a panel skirt layout.  A panel skirt is when you have strips of fabrics (usually wider at the bottom than at the top), and sew them into a circle to make a skirt.  These look pretty easy, and they are a great idea if you have scraps you need to use up!


There is a very clear, easy tutorial on how to do this here.  I used it for the basis of my own skirt.

Step 1: Calculations

To find the dimensions of the panels, first take the measurement of your waist.  Here's mine.


Measurement of waist: 38

Divide that by 10= 3.8

Add an inch for seam allowance (and round up)= 5 inches

This will give us 10 panels that are 5 inches across on the top.

To determine the bottom width, we need to think about how full we want the skirt.  I want a lot of fluff, so I'm thinking I'll add 2 inches to each side.

Our bottom length= 9

That gives us our top and bottom measurements, but now we need our length.  This is really up to you.  You can make it short, or long, or in the middle.  I'm thinking I want mine to be mid-calf.

Now measure length: 27

Add an extra 2 inches for top and 1 inch for bottom seams= 30

So our length will be 30 inches—but we will lose about 2-3 inches of that in seams.


Now we can copy these measurements onto parchment paper or newspaper for a pattern.  It should look something like this.


When you go to trace your pattern onto your fabric, because the angle should be the same on both sides, you can stager your pieces facing up and down—as long as your pattern is reversable.  Like this:


Step 2: Pattern

I used parchment paper to trace my pattern.  I used a ruler to measure 5 inches at the top, marking the center (2.5) to draw a vertical line down to the bottom measurement.

0B026D8E-4D3D-47C5-AD20-A3559D9DBF82_zps


I did the same for the bottom measurement; marking (from my center line), 9 inches total.

BBC55F0E-4943-491C-85DF-771C6CE136A6_zps


Using a straight edge (which was my cutting mat) I connected the center lines from my top and bottom.  Then, using the mat again, I connected the outside edge of my top line with my bottom line.

5C6BC49A-A5AD-4BDF-9C60-BDE9D92F00BD_zps


Then, I cut out the pattern.

7D457E8C-C3B8-4F09-BDDD-8BCBB2FD0151_zps


Step 3: Trace the pattern

I traced the pattern on 10 times, flipping the direction of the pattern each time.  This made it easier to cut out.  (Note: I used a sharpie to do this, so you can see the dark purple lines.  Typically you shouldn't do this, but since I knew the seams would cover the  marker, I used this method.  You could also use fabric chalk, which would wash out easily.)

96A6BB1C-9E87-4B26-8EB0-97FFF84EF713_zps


Lay them out side by side and they look like this:

64B31266-D6AB-4800-BED8-101EFE3F7361_zps


The next step it to iron all the panels.

218D16D2-4EB2-4207-B89F-74BB8C67A366_zps


Step 4: Sew the panels

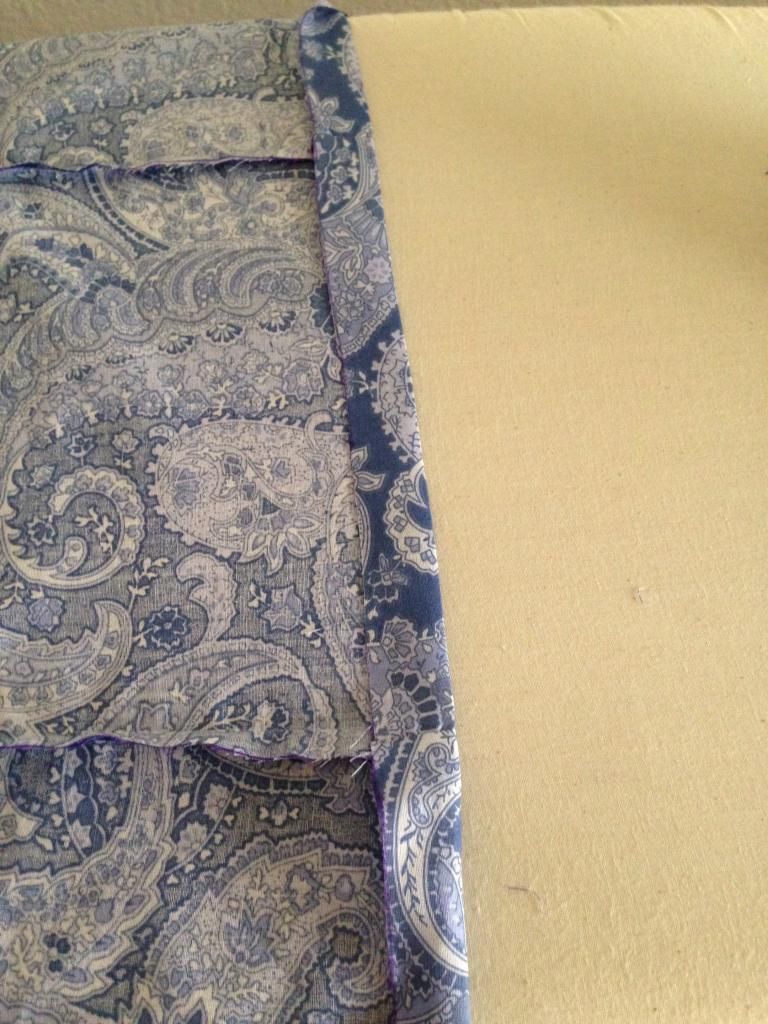
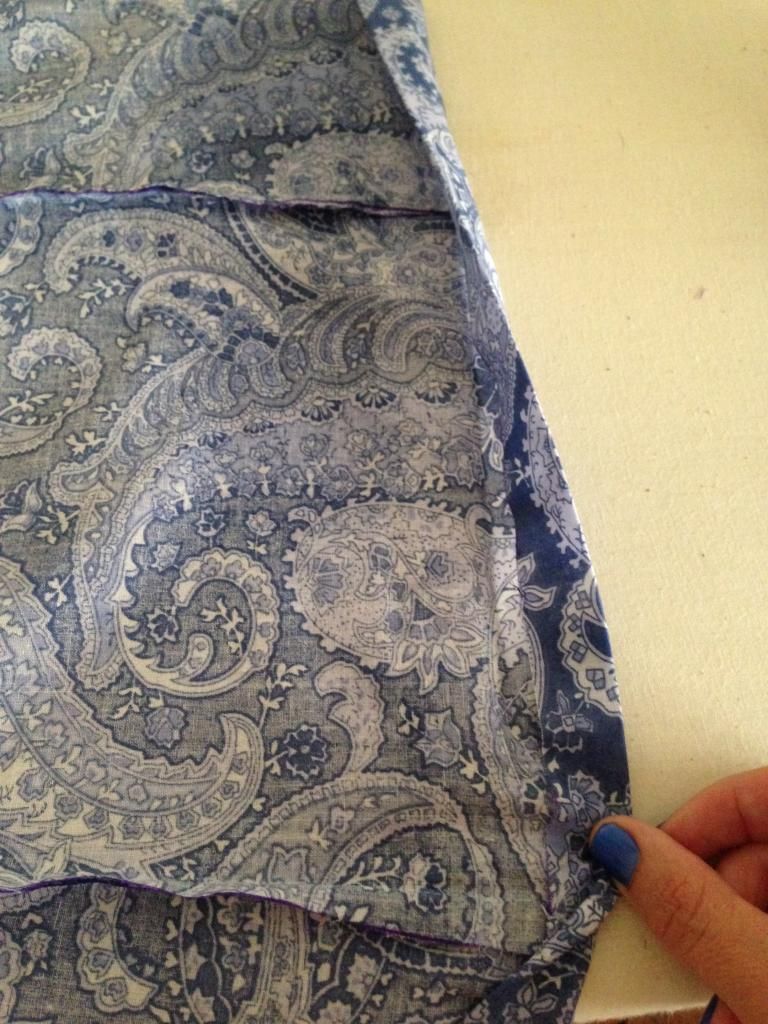
Then, start sewing.  You'll be straight stitching each panel to the one before it--right side to right side.

BA9D64E3-A2EC-4E6A-B21D-8ECDBFE3AEBF_zps


Place your first panel on your sewing machine, face up, and the next panel face down on top.  Stitch, and repeat.  You'll sew all 10 panels together in this way.

843A0CC6-31FD-4B5E-A985-7DC2AE178363_zps


At this point, I tried it on to make sure it would be the correct width, length, etc.  Here, it's too big by 2 panels.  If I had left off 2 of them, the skirt would have fit perfectly.  But the point of this kind of skirt is having the extra fabric.  But it fit over my hips okay--which was what I was worried about--and the length looked good.  So you take the first panel and the last panel and sew them together, right side to right side.  It'll look like this when done.

E98BAFF6-D808-472E-B63E-AA0D00DFBFF9_zps


A4F29DF1-01EA-4047-BEAD-3D0DB895FE6C_zps


Step 5: The hems

First, the bottom hem.

Put your skirt on the iron board and fold the bottom hem up 1/2 inch or so.

C1AAA781-451F-438C-A692-99B3A2CCC3B7_zps


Iron it down. Then fold that up onto itself, giving you a double folded edge. Iron it again. I put pins in as well, just in case.

BDED321A-97F7-4C50-BD33-95EB637EC0A2_zps  
This next part, I was so excited about. While shopping with Pockets the other weekend, I bought a new set of needles for my sewing machine--I broke at least three of mine while making those Pikmin hats. While there, I saw that they had a double needle, for doing professional-type hems. I bought one, with this project in mind. I've never used a double needle before, and I was so anxious to try it out.
 
1C3638F2-F80A-43D2-BD69-A58E85631D3C_zps                                      

The double needle fits into your machine the same way your normal needle does. I had to search through all sorts of tutorials to try to find the info on how to do this; it's surprisingly scarce. I think it's because it's so EASY, no one bothers to explain how to do it!

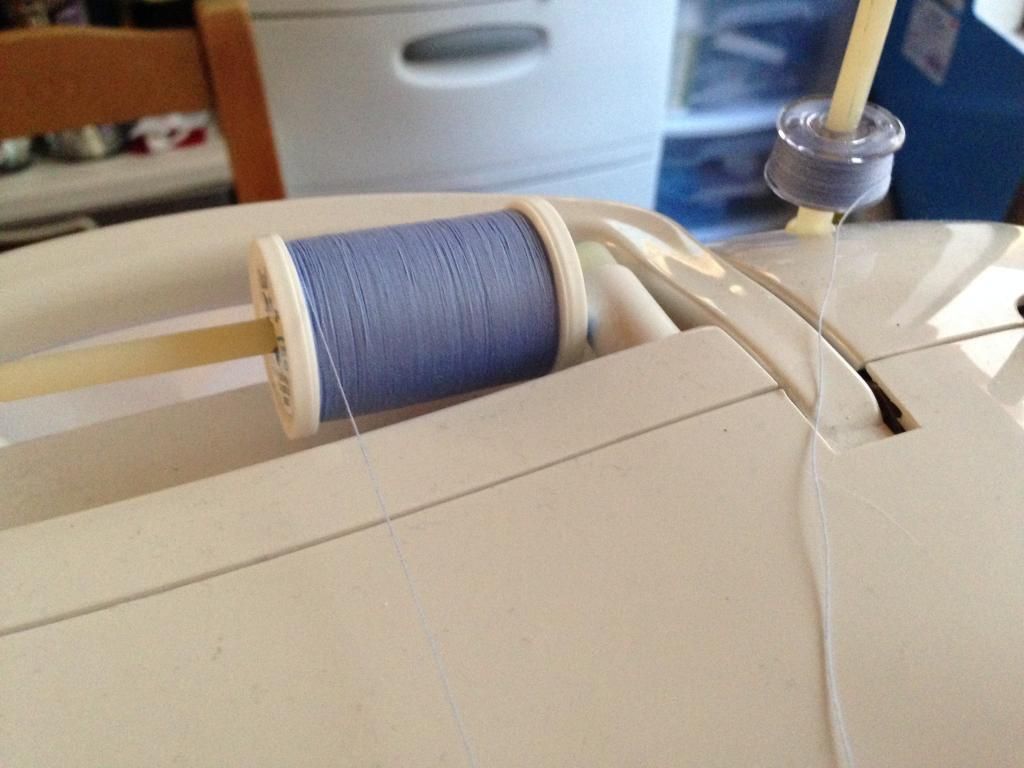
First, you need two spools of thread. I used my colored thread I bought to match the dress, and I used a bobbin filled with the same thread. My machine has two thread holders, so this part was quite simple. If your machine doesn't have this, there are several options for setting up a second spool of thread--including putting it on your bobbin threader.
D3DFF9B0-7274-4048-8383-8F5CD951976E_zps


The important thing is to make sure both your spools thread in OPPOSITE directions. If one unwinds clockwise, make sure the other is going counter-clockwise. This will keep them from getting tangled. Thread both through your machine, just like normal, and put one thread through each needle.

01617534-D2EE-4A54-95C6-42683AE89089_zps

Make sure the outside of your fabric is facing up--this is where the double stitches will be. The back will look like a very tight zig-zag.

NOTE: for normal double stitches, keep your machine set to a straight stitch. There doesn't need to be any special setting.

4CEEE4CE-1C45-4C4E-B3E8-7A8CDE2CDB2F_zps

Here's how it looks completed.

99238FCF-9806-4B94-BC04-6070E056DB85_zps

Now the top hem.

Take the top and fold it down enough to cover your elastic.

E8A0C52E-C4B7-40FA-8B28-24531E918069_zps

I used thick elastic because that was all I had on hand.  You can use any thickness you want.  But you'll be creating a pocket for the elastic to fit in, so you need to make sure you're folding down the material enough.

Once that's done, and pinned down, you'll want to straight stitch around the skirt, leaving one panel length open for inserting the elastic.

32CB68C9-9FAC-4C87-9921-D1CBBE3EEFBA_zps

Here's the pocket's opening:

2E0677AE-7682-42C8-94CE-3BFEFADCB55B_zps

Pin a safety pin onto one end of the elastic.

A394F312-DF72-4BC8-A2F3-037B06DF64C3_zps

Thread it through the whole loop, pulling it out the other end.

5D730639-2D24-49F4-BE57-67ABBFE7D8E4_zps

Overlap the ends about an inch and sew together.

49CAE377-BD55-4A05-B49A-BCA0ED148383_zps

See how it tucks up nicely in the pocket?

2B01B6AF-2C1A-4181-862C-1C3A340DB6E7_zps

Sew that last hole closed and you're done!

614856BF-C3CA-42F4-BD5D-8922A44A46FF_zps

I tried it with two different shirts.  :D

2E94E6F2-A38D-4151-8F3B-F7CFEF507398_zps

51AA3199-DB10-448A-AFA4-815973A0ADFC_zps 

The skirt turned out adorable!  And it was a pretty easy project, if a bit time consuming. 


~Buttons