Showing posts with label tutorial. Show all posts

Saturday, August 13, 2016

Teacher's Apron

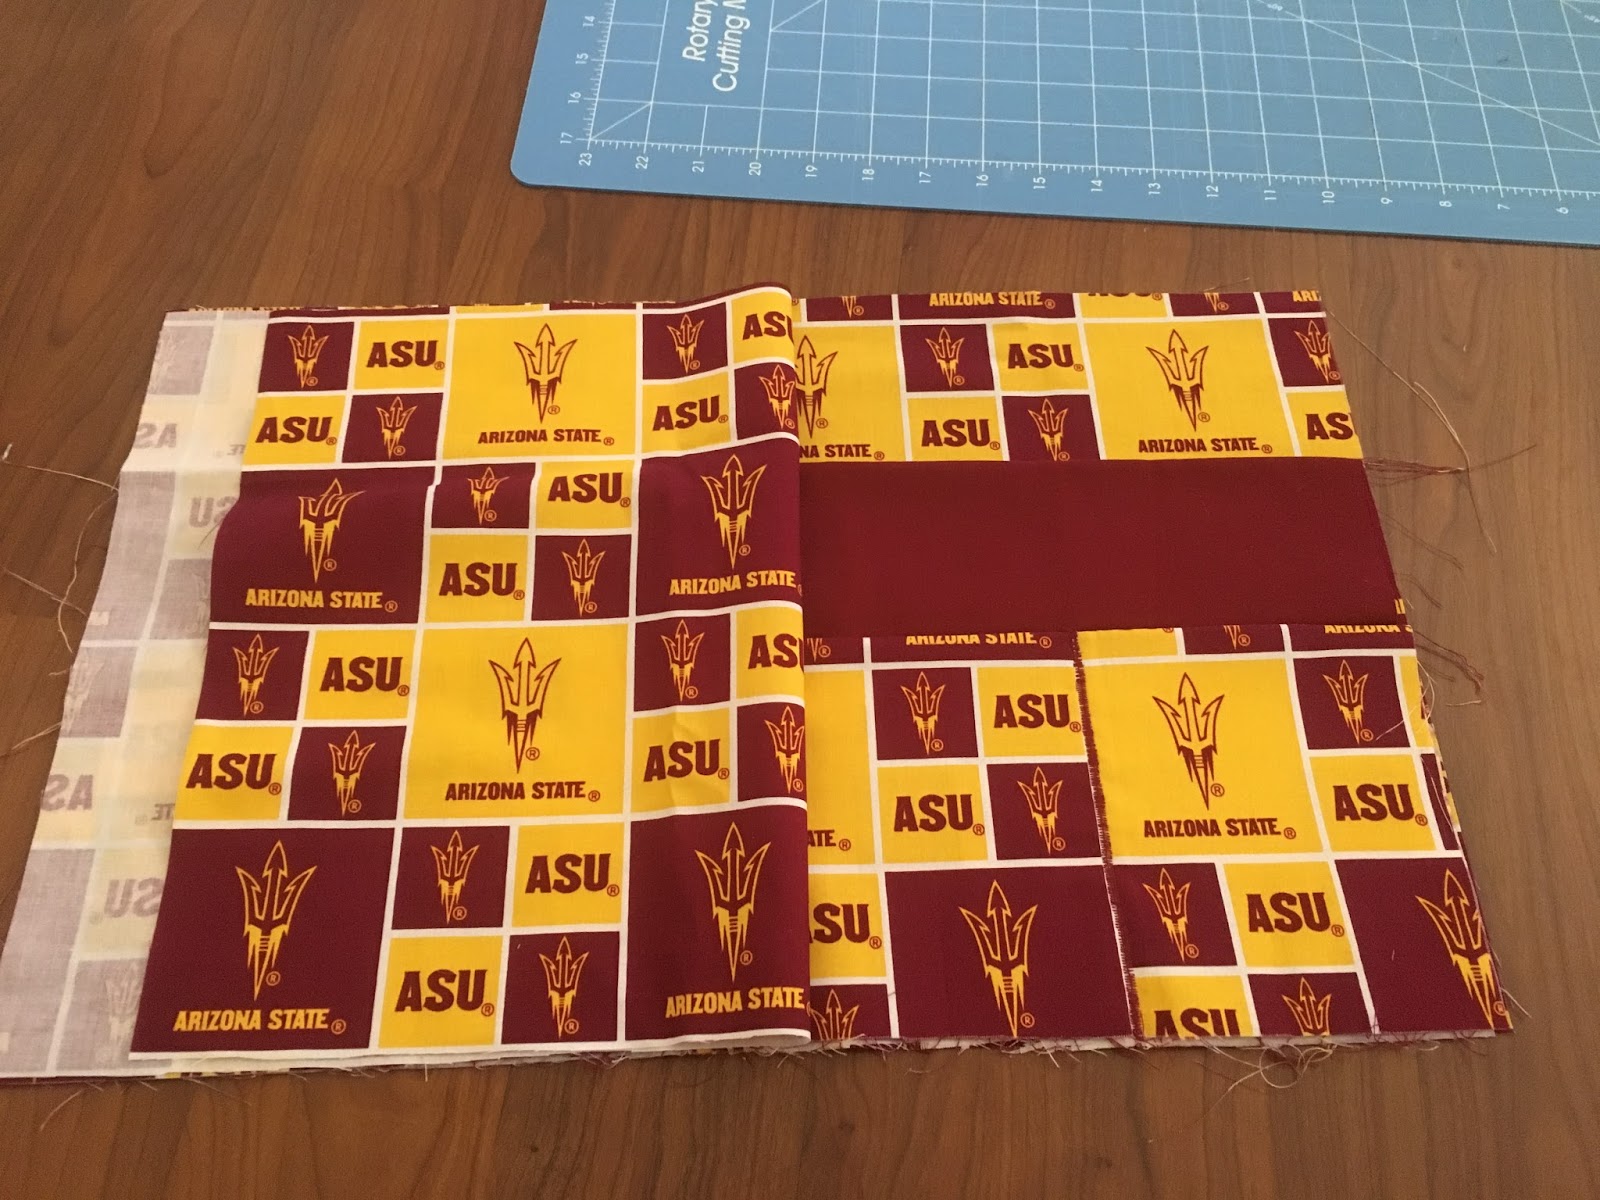
For school this year, the teacher I work with asked me to make her a teacher's apron to wear around the classroom.  This would help keep her phone, notepad, pencils, etc. all within reach at any given moment.  It's actually a great idea for teachers to have!  For the project, she provided me with a yard of ASU print cotton fabric.

I searched online until I found a tutorial that I wanted to mimic.  I found this amazing one from Sugar Bee Crafts.  Though their aprons were for working at craft booths, the style was one that could be useful for teachers as well.


I also had a small cut of a maroon fabric that matched perfectly, so I incorporated that into the design as well.

First, a list of materials:

Two 12" x 19" rectangles in the main fabric
Two 9" x 19" rectangles in the contrast color
Two 6" x 19" rectangles in the main fabric

Of course, you can have these all be the same, you can have them all be different.  It's really customizable.

Also, you'll need 3 yards of bias tape.  I found this to be the easiest way to finish the top hem and make the ties that go around the back.


First, start with the two 6" by 19" rectangles.


Sew them together, right side to right side, along the TOP hem only.


Fold it over and iron the seam flat.

Repeat this for the 9" by 19" rectangles.


I used the red on the outside to help break up the pattern, and the ASU fabric on the inside.

Next, measure your 6" x 19" pocket and mark the fabric with pins at the 1/4 point, the 1/2 point, and the 3/4 point (that is, 4 3/4 inches, 9 1/2 inches, and 14 1/4 inches).


Place the 6" x 19" rectangle atop the 9" x 19" rectangle.


Pin them together with the smaller piece on top.  Sew a zigzag stitch from the top of the 6" x 19" piece to the bottom at the 4 3/4 inch mark and the 14 1/4 inch mark.  Your stitching will secure the smallest pockets to the larger pockets in back.


Next, take only one piece of the 12" x 19" fabric.  Place the sewn part on top.  Stitch from the top of the 9" x 19" piece to the bottom at the 9 1/2 inch mark.  This will secure both of the top layers to the bottom.


This gives you two pockets on the middle row, and four on the bottom.  

Now lay the last 12" x 19" piece of fabric atop the sewn part, right side to right side.


Sew down the side, along the bottom, and up the other side.  This leaves the top hem completely open.  Flip it inside out and press the seams.


For the top, you can measure exactly how long you need the bias tape to be in order to wrap comfortably around your waist.  I wanted to make sure there was enough tape to go around the back and to the front again, so I used the whole 3 yards that came in the package.

With the center of the bias tape, pin it to the center of the apron.


Sew a straight seam along the top side the whole length of the apron only.


Fold the tape over and stitch from the center all the way along the right side of the tape until you reach the end.  This secures the other side of the tape to the apron, and also closes off the tape used as the ties.  Repeat from the center to the left side.  At the end, fold the last inch of tape under and sew it closed.


And that's it!  These aprons are cute and functional!  They have many other uses besides just being in a classroom!


~Buttons

Thursday, March 5, 2015

Baking Polvorones

I work at an elementary school with 4th-6th grade autistic children.  The sixth graders are currently doing country reports, where they pick a country and research it.  For extra credit, they were able to dress up in that country's native garb, or bring in some food from that country.

One of my boys is having a hard time a home--with deaths in the family, surgery for his mother, chronic illness for him--so to help out, I volunteered to make the treats to bring in for his presentation.  His country was the Philippines, so I decided to make polvorones.

I found a recipe from Pinterest, and it was pretty easy to do!

Ingredients:
3 cups all purpose flour
2 cups powdered skim milk
2 cups white sugar
1 cup (2 sticks) butter, softened but not melted

 
First, put the flour into a skillet over medium heat.  Cook for 20 minutes, stirring constantly, to brown the flour.

CC572DBF-79B3-4112-8D76-D6FAD444D3B9_zps

This was the trickiest part.  At first, the flour didn't change colors, so I was concerned.  But eventually, it took on a light brown color.  The smell was a bit strong--though not unpleasant.

78D7F8A2-DC32-44C2-9766-FD0D5FE31BAA_zps

The left is the browned flour.  The right is normal flour.

Next, put the flour in a mixing bowl and let it cool slightly.  Then, add the sugar and powdered milk.  Mix together.

DDC59D5A-0412-4BF9-AAC6-E9392B7E986B_zps

Next, add in the butter.  Mix together with your fingers.  It will produce a very loose, grainy dough.

B0537B5E-DB0C-4376-9E50-CE87022FB7C3_zps

Apparently, this is normal, as the desserts are called "buttery, fragile and literally melt-in-your-mouth powdered candies."

Next, you need to compress the dough into shapes.  The recipe calls for a specific mold, but I just used mini muffin tins.

47D8E109-096C-46A0-8A47-B0F336076AD5_zps

I used a spoon to shovel the dough inside, and then compressed it (like when you measure out flour into a cup).

Refrigerate for at least two hours.  Then, remove from the mold.

44040801-8DDB-410A-A3B6-8DAC5769CD29_zps


These turned out very, very tasty, BUT the consistency was so grainy!  It was a bit off-putting because it felt like a bunch of sand in my mouth.  I explained this to the kids before they ate, suggesting they take little bites.  Of course, the sixth grade boys saw this as a challenge and nearly half of them shoved the whole cookie into their mouths at once.  *sigh*  Either way, most of the kids enjoyed this treat.  I would definitely make them again, but probably add a bit more liquid (butter was the ONLY liquid in the recipe), to give it a more dough-like consistency.  And the polvorones were better tasting when chilled, so I kept them refrigerated until we passed them out.


~Buttons

Saturday, January 10, 2015

Hogwarts House Scarf and Hat

Pockets is a very proud Hufflepuff, but it's hard to find nice Harry Potter things that aren't Gryffindor.  So, we're always on the look out for things we can make into Hufflepuff things (and Ravenclaw for me).  While at JoAnn a few days ago, I found a really cute gold and black argyle fleece.  And since I'm going to crazy making fleece hats, I'm enjoying working with the material.  And I thought it would be awesome to make Pockets a Hufflepuff hat and scarf!

So, the first thing I did was determine if I wanted the argyle diamonds to be horizontal or vertical:


Vertical


Horizontal


I decided that the vertical looked better, having the diamond's long points be up and down.  Then I had to decide if I wanted it to have two full gold diamonds, or two full black diamonds.


Black


Gold

I decided to go with the black.

I cut out two strips (the fabric was 60 inches wide).


Then I lined up where the diamonds met, and trimmed both edges.  Using clear quilting thread, I sewed the two edges together.


The seam is hardly noticeable!

Now, for the hat, I traced the pattern, again with the diamonds going vertically.


You cut a front and a back piece, then sew up the sides, right side to right side (see a more detailed tutorial on that here).  I left about an inch or an inch and half undone at the bottom, because I wanted to sew that seam on the outside, and fold up the brim.


Turn it ninety degrees, and sew up the little V that's still open.


This is the outside of the brim, with the seam on the inside.  (Does that make sense?)


And the final product:


It turned out so cute!  She really loved it when I gave it to her!


(This is me, trying it on.  I only wish they had the blue and bronze of Ravenclaw, and I'd made myself a set!)


~Buttons

Thursday, December 4, 2014

Hooded Towel

Happy Holidays!!  Pockets here.  Did you all enjoy your turkey?  I certainly did.  One of my favorite parts of having a significant other is that now I get TWO turkey dinners instead of just one.  Score.

Anyway, this month one of my very bestest friends, Bird, is having a birthday party for her darling 1 year old.  Poor Birdlet has been the unfortunate recipient of many of my attempts at baby clothes and also the very first quilt I ever made.  So keeping the tradition alive of pawning off my crafts on her I decided to make a hooded towel.

There are a ton of tutorials for this on Pinterest.  I read a bunch, attempted one, failed horribly, tweaked the directions and ended up with an awesome towel!  So here's how I did mine!

I started with one towel and one hand towel.  Versions 1.0 and 2.0 respectively.


With 1.0, I shortened the hand towel to the suggested length.


However, this left one ginormous end (like the far right edge) that down the line, my machine could NOT get through.  It caused much screaming and frustation.  It also made the design on the hood slightly unappealing to the eye which I'll point out later.

On 2.0 I shortened the hand towel only in that I cut both bulky edges off.  This made it a breeze to sew later and the hood a bit larger than 1.0.


After this fold it in half so the cut edges are together.  Turn it 90 degrees and sew down the two short sides.


This will leave the longest side (the cut sides) open:


Next, put your left hand inside the opening and grab the top right corner.  Poke the corner in so your left hand can grab it.  


Take that top right corner and nestle it up against the inside top left corner.  You'll end up with this:


Pull the bottom right corner, where my hand is, open and your hood will start to form.

(see how one half has that decorative line and one doesn't?  That. drove. me. insane.  I opted for a different type of towel for 2.0 for that reason.  It might have turned out more symmetrical if I hadn't cut the other side so much that the same decoration is actually at the very bottom of the other half.  Also, bulky towel edge. GRRRRRAAAHHHHH)

 Arrange it to your liking.


This next step is important, do it immediately!


Put it on your head.  :D  And then send everyone you know pictures of yourself wearing ridiculous, toddler sized, KKK-esque, towel hood.  Seriously though, it's almost impossible to resist the urge to put this thing on your head at this point.  It's actually really warm, I can see why kids love it.  

Okay.  That's the hard part, now it's easy.  At this point your hood still has an unsewn opening down at the bottom.  The next step in a lot of tutorials is to just sew the hood as is to the towel.  I was completely unable to do this.  The design of the hood makes the two edges very uneven.  I sewed it as is and then had to rip it. I missed sections of the second edge so it left gaping holes.

So I threw an extra step in there and sewed the hood closed.  This is also where it is a god send to cut off those huge towel edges.  It will make the hood a tiny bit bunchy but I think that just adds to the coziness.


Now, sew it to the very middle of your towel.  I was so enraged at my machine not sewing through bulky towel on version 1.0 that I just sewed it on and didn't bother to check or pin.  I just wanted it done.  As expected, it's laughably off center.  I was much more careful with 2.0 and pinned very thoroughly.


I sewed it just one on top of the other.  I did NOT do right side to right side.  I wanted to try and keep the seam as minimal as possible.  After I sewed this I reinforced it with an additional zig zag stitch.  The towel is heavy and puts a lot of strain on this seam.

YOU'RE DONE!  Good job!!

Now put it on again!


An optional step is to add some embellishments.  I wanted to do a decrative edge stitch on the large towel but my stitches were so small compared to the wide edging on the towel.  I decided to attempt a monogram instead.  It turned out okay, not great.


Then I laid it out.  Folded the large towel up in half and then up in half again.  Then I rolled the edges in and tied some scrap fabric from the Birdlet's quilt around it and now I'm party ready!


I can't wait to see how she looks in this thing.  She's only a year old so I think she'll be swimming (hahaha) in it and I expect it to be ADORABLE!  Hopefully Bird will let me post some after pics.

What do you guys think?  Pretty easy craft?  It seems more complicated that it actually is.  On version 2.0 I think I spent, at most, an hour.  Let me know how yours turn out.

Thanks for reading!  Happy Holidays!!!

~Pockets