Showing posts with label dogs. Show all posts

Tuesday, May 24, 2016

Dachshund Wrist Rest

Buttons, here!  Recently, I stumbled across a Pin that showed a cute keyboard wrist rest in the shape of a cat.  I thought it would be a fun project to try, and I also wanted to see if I could shape it like a dachshund instead!  It was the prefect time to make a present for Father's Day (my husband is a wonderful doggie daddy), so I got to work.

Materials:
Fleece (or some other easy to work with fabric)
Sewing machine
Hot glue gun
Stuffing/Padding

First, I cut out brown fleece into a rectangle for the body of the dog.


I didn't really measure, only guesstimated the length of the keyboard.  Next, to make it look like a dachshund, I cut out two rounded back legs.  Our dachshund likes to lay flat on his stomach with his legs poking out like drumsticks.  I wanted to mimic that here.


Again, I just cut.  I have a lot of left over fleece, so I wasn't too concerned with making mistakes.  Plus, the pieces were so tiny, I was cutting from scrap pieces of fleece anyway.  I cut out a long, slightly curved tail.


Using the back feet as a template, I cut out two front feet.


Next, I had to get the shape of the head.  Dachshunds are well-known for their very pointy noses, so I wanted to make sure the snoot was emphasized.  I also cut out ears, thinking it would add more depth to the project.


Using black fleece, I cut out oval eyes and a rounded nose.


 Now for sewing it all together.  First, I turned the body inside out, right side to right side.


Next, I stuck the back legs and tail inside.  This is going to create a pillow type closure, which we will turn inside out, hiding the seams.


Sew it shut.  This can be tricky if you're using fleece.  My sewing machine occasionally has a hard time getting through all the layers.  Just go slow and hand pedal if needed.


After that, sew up the long side.  That will create three closed sides (two sewn, one the natural fold in the fabric).


Now you can turn it inside out and pull the legs and tail straight.
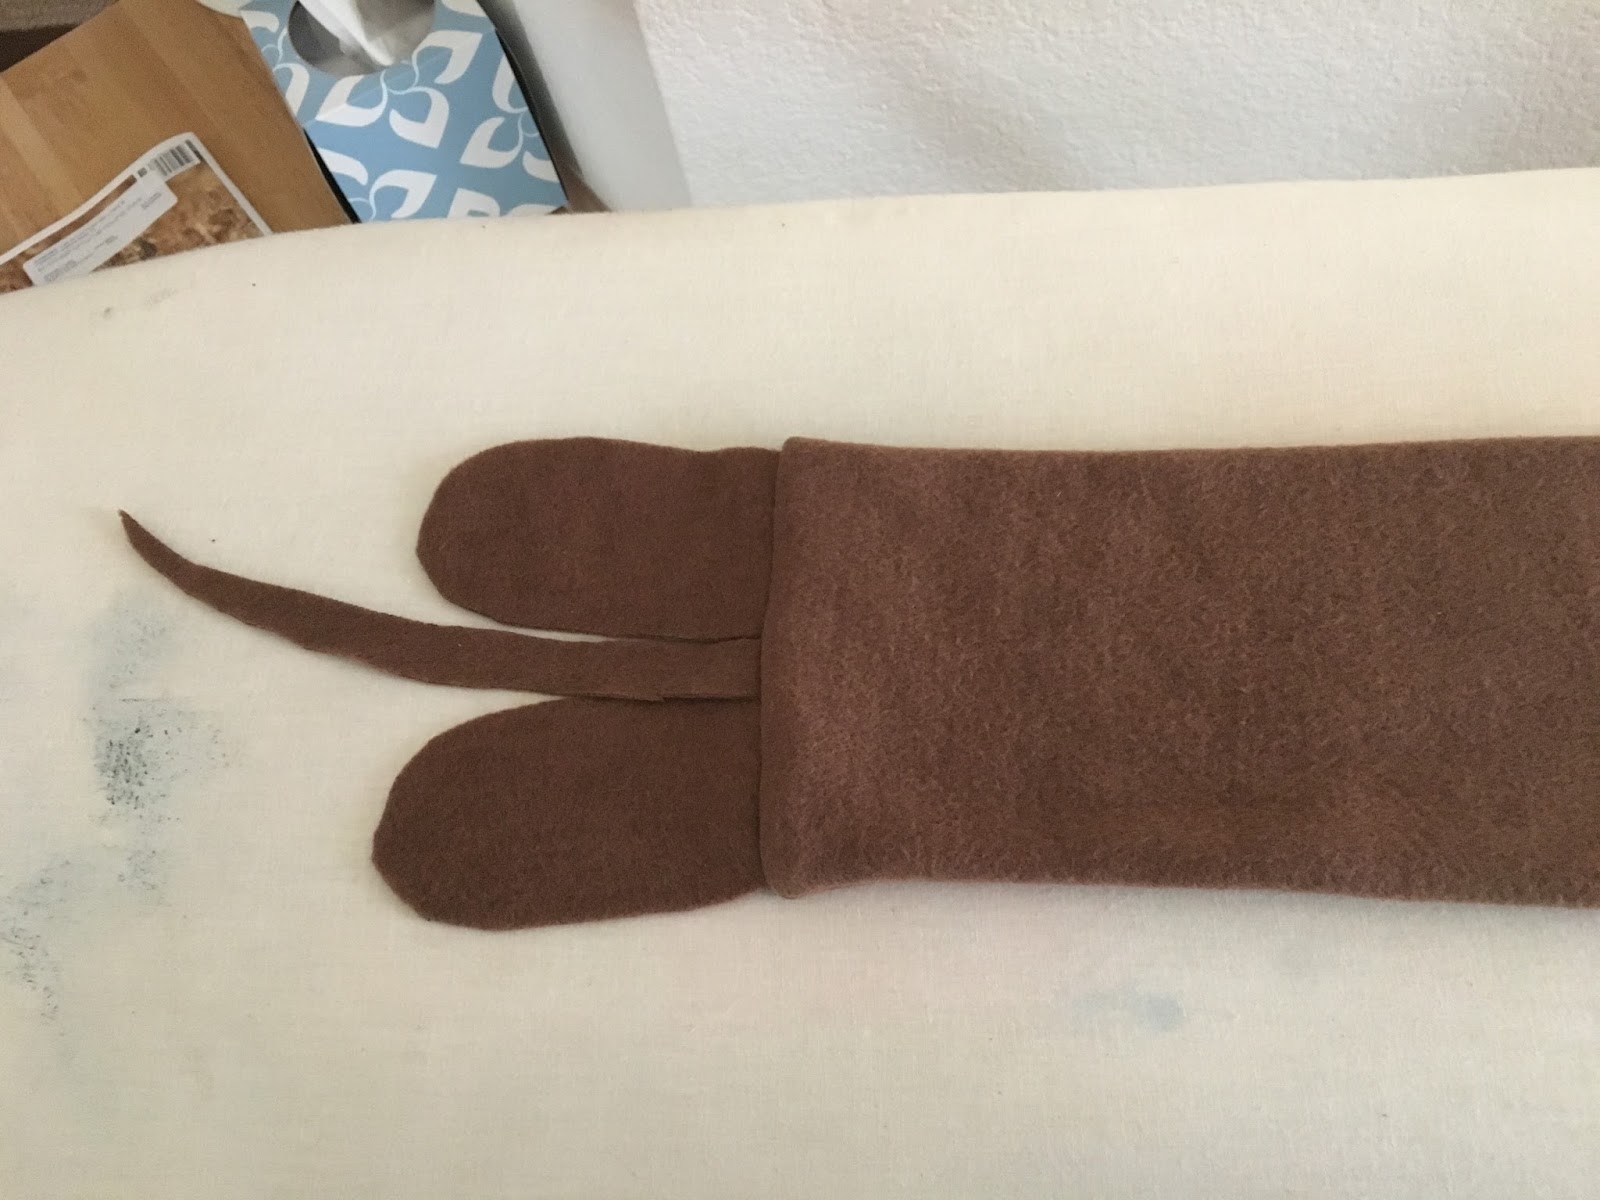

For stuffing, it's personal preference.  Using polyfill would be fine; I also some some tutorials that used rice.  I had some left over padding that seemed the right fit, so I chose this.  It's not as thick as polyfill would have been, and not as heavy as rice.  I think it'll work for my needs.


Cut off any extra fabric.  I was sad to do this since dachshunds are notoriously long.  But my padding piece was too short.  Then, tuck the seam inside the body and stuff the front legs in too.  Sew it shut.  This doesn't need to be a pretty seam since the dog's head will cover most of it.


I didn't really care for the way my dog's head looked.  Plus, I wasn't sure how to assemble the ears onto the face without it looking weird.  So I used my existing head and ears as a template and re-cut the head into one piece.


Using a hot glue gun, I adhered the eyes and nose.  Then I glued the head to the top of the body, covering the seam and a small portion of the legs.

And there you have it!  A cute, super easy wrist rest!  It took me about an hour total of work and prep.


And here's my inspiration!  They're almost the same length!


~Buttons

Saturday, November 29, 2014

Dachshund Pajama Pants

I love all things Dachshunds, so when Pockets and I were out shopping yesterday, I saw this adorable Dachshund flannel print at Joann.  I had to buy it!

886C907F-E10B-4E20-B53B-7F868A931CE1_zps

I decided it would make cute and comfy pajama pants.  So I found a tutorial on Pinterest and got to work!

Materials:
About 2 yards of fabric
Thread
Sewing machine
Elastic

First, use an existing pair of pajama pants as a pattern.  Fold the fabric over and place the pajamas along the folded edge.

175038D6-3493-4EB4-A4E9-C6D90FB86E7D_zps

98D29C3E-EF82-4B1C-BDC7-EDD9B53B77E8_zps

I placed mine a little further from the edge so that the legs would be wider.

Next trace about an inch away from the pajamas; this will give you a seam allowance.

175038D6-3493-4EB4-A4E9-C6D90FB86E7D_zps
I used a pen, so the lines are a bit hard to see.

Next, cut the line, going through both layers.  It'll give you a weird looking piece like this:

96084113-54D8-4BB4-B52F-7C64BDB9A913_zps

Repeat on the other side of the fabric.

BA44E832-F988-48BC-99E8-88EE686BA8DC_zps
I just put the cut out pattern on the opposite side and traced it that way.

So you'll have to identical pieces:

CB0352B8-38D2-4AC2-9FD5-B6E4DF061CE5_zps

Place them together, right side to right side, and stitch only along the curve.

1800D1E8-7F97-4ED7-BEA4-9BFA206B69F6_zps

So it's only sewn together by both curves.

A1BF2E26-AA9D-4E3E-AF7F-B12F15DB19D5_zps

Now, open it up and place both of the SEAMS of the curves together.

ea9a2c1e-4224-4a1f-9f20-39e7bea858a6_zps

71A5FCAE-3642-4B53-AF16-D52E51E3D88E_zps

Next, sew up the curve of both legs.  I started at the middle and went down each leg separately, but you could do it from one leg up then down to the other leg.

B014879D-306E-4F88-B148-6FCCA594B79A_zps

Flip it right side out, and sew up each leg's hem.  I folded it under twice, then did a double hem.

64AF1D14-A3B7-4C2B-9929-427127B1137E_zps
Make sure you try it on before stitching your hem.  You may need to take more or less depending on your height.

Next, pin the top hem down about an inch (or however much you need to make a pocket for your elastic).

8D024919-9C97-49CB-BD26-218958B21CF0_zps

Sew all around the top, leaving only an inch open.

F48B1402-7818-4682-9FAC-E53B5803C350_zps

Use a safety pin to get the elastic through the sewed up pocket.  Sew the ends of the elastic together.

D9107F34-9C9D-45AF-B873-D35D7F6BCC4A_zps

Stitch up the last inch on the waist hem and you're done!

3E5D15AC-9D9A-4D3C-B51E-BC8A989571C3_zps

EE4B6A47-5F2E-40BD-80AF-E100CC570C15_zps

F524051A-1A82-4A77-B5AA-144939EC6C9F_zps

55B7193A-7DB4-4876-B4D9-3E269E9A7159_zps

They are oh so comfy!

~Buttons

Monday, October 6, 2014

Princess Peach Dog Costume

While out shopping many months ago, Pockets and I saw blue jumpsuits at Kohl's.  I am not a jumpsuit kind of person, but as soon as I saw them, I though "MARIO and LUIGI!"  So, we bought them and wanted to turn them into Mario and Luigi costumes for Halloween, Comicon, etc.  It's actually kind of funny because she is younger, taller, and thinner than I am.  *lol*  A perfect fit!

Anyway, I still need to make my Mario hat, and I'll try to get to it this week.  Still, wanting to stick with the theme, I decided to make Friday, my 7-year-old female Dachshund, Princess Peach!

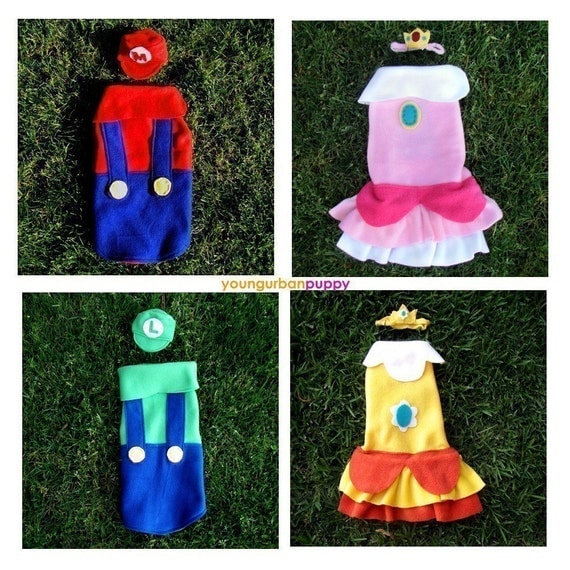
I saw this outfit on Pinterest (you can buy it from Etsy), but I wanted to try my hand at making my own.

princess_peach_dog_costume.jpg
il_570xN.180178917.jpg

I chose fleece to work with because I already had a ton on hand (from my Pikmin hats over the summer) and because it's a very easy material to work with.  It doesn't fray, so you don't need to worry about hems.

First, I cut out the body, going to form a loop around Friday's neck, then down to her hips.

317360D5-0BCC-4016-9994-ABE59CC58076_zps

Friday is not the best model, so sometimes it was hard to get her to sit down.  Because of this, Mr. Smith--my 8-year-old male Dachshund--got to try on his sister's pretty princess outfit.

7C7ECEE8-D560-472C-8059-B9191C7F0B0E_zps

On the neck bands, I sewed two Velcro pieces--one inside, one outside--so the pieces would match up.

700BCE71-B3C0-4BCA-8D70-BE4DC76F9070_zps

CC621D6D-DB97-4821-9697-D6AC1360918F_zps

Next, I added a band around her waist to keep the garment in place.  I sewed a strip to each side.

D5791BD6-799C-4E8F-8365-A67E0F94454E_zps

Found where they met in the middle.

9077BA34-9921-42F2-8D84-2CFCFE800B1B_zps

Trimmed it.

7E2CE3AA-9C9B-4464-A18E-2908D641D89E_zps

Then sewed on Velcro pieces.

F30DABAB-40A0-4B69-8290-6AD6041FC4BE_zps

08CD22D0-520C-45A7-835B-19562CC1A4F2_zps 

Now, I had to make the neckline.  Peach has a dark pink collar at the top of her dress. For this, I bought four pieces of $0.34 felt at Joann.  I cut out the pieces to be elongated half circles.

BC2C9862-23CF-46A0-9BFC-4C87A3A8BA7D_zps

I sewed them both on with just a straight stitch.

6D481F49-38D9-4D69-9B9D-C9068814AC4B_zps

8E9359F4-4808-41E6-8009-4807909077A7_zps

Peach also has a jewel on her gown.   I cut it out of yellow and blue fleece.

67A1ED80-6EDA-4FA0-A134-CC89D59D0CAB_zps

But I saved adding it for later, because I used the iron-on method instead of sewing.

Now I had to make the skirt.  I took the same pink fleece and cut out a rectangle that was nearly twice the width of the body.

7BF69B0C-F960-4CEF-97C0-851978EF35A4_zps

I gathered one edge of the rectangle.  To do this with a sewing machine, you can use a ruffle foot.  I don't have that, so I had to gather it differently.  I started by straight stitching a seam all along one edge of the rectangle.  When you do this, you need to make sure the machine's stitch length is set to as long as it can go.

F0F919B7-06FA-4B23-A202-02AB3B2DF814_zps

Then, once your stitch is complete (and DON'T backstitch at the start and end of your stitch; the thread needs to be loose, not set in place), pull on one piece of the thread to make a small gathered area.

9FB15E15-C4AD-473D-B84F-3A400B1BF940_zps

Repeat this step, on both sides of the rectangle, moving the gathered portions towards the center of the material.  Once the larger rectangle is about the same width as the body, stop.

F4654299-8C98-494C-8024-8004F58718DD_zps

Pin the skirt to the body and sew!

EB33C893-B4E5-442A-9B77-FA1C0B94365D_zps 

Now the skirt ruffles.  The same sort of elongated half circles are used to create the skirt ruffle, but slightly bigger.  This was the hardest part of the outfit, getting these sewn on, on top of the gathered section.

B3EBCB7A-FB98-48E2-88A2-60E4D242D378_zps

Sew on with a straight stitch.

0FA93437-FD8F-44B4-B63E-1559FAFA42E5_zps

102A70CE-4B2B-41A6-8445-C0F579DAE230_zps
(notice my buttons rug under my sewing table?)  :D

For the crown, I wanted a 3D one to sit on top of her head, but I needed felt, and I didn't have that in yellow.  So I settled for a 2D flat piece.  I cut out the crown with three spikes, then sewed on two skinny, long threads to either side.  The threads could be tied under her chin to keep the crown in place.

C09FB47A-6DD9-414C-B8FD-7B848BC4A3EC_zps

C12AF002-50E0-43DA-9C8A-B83C47668368_zps

Now for ironing on the jewels.  I bought a bunch of iron on fabric (Pellon Peltex 2), with adhesive on both sides, so it fuses your materials together.  It's very helpful when dealing with tiny fabrics.

I took my blue and yellow jewel for the dress and put the adhesive on the blue oval.

434F955D-D5D0-4DC7-B8BC-CC4BD46E71CA_zps

I placed it on top of the yellow.

F84B8213-492F-4F3D-A7A0-C801952933E1_zps

Then, I covered the fabrics with a cotton buffer cloth (fleece will melt if it comes into contact with a hot iron).  Spray the buffer cloth with water, so it's damp, and iron.

F5A0F3AA-AC0A-45DB-A58D-9385824FAB4A_zps

Next, I flipped the jewel over, so the yellow side is face up.

24C2BDCD-EAC4-4988-A8D9-D45791275FF0_zps

I placed the buffer cloth back on top, dampened it, and ironed again.

With another piece of adhesive, I placed it on the dress, and the jewel on top.

575B0C54-4429-4C26-B104-A22F7540D98D_zps

I covered it with the damp buffer cloth, making sure to cover ALL the fleece!

CF29F6E9-9603-4457-9F8D-66ECE8CDBC62_zps

Iron.

C3DE3D19-0BA8-495E-A617-6545B6335570_zps

Flip over, and iron again.

Do the same for the jewels on the crown.  Peach has a red one (I used dark pink) in the middle, then blue ones to either side.  For a full crown, the jewels would just switch between red and blue.  I only needed three; one for each prong.

D64595CD-8234-4F58-84B8-62D8EADB019C_zps
(I wanted to use up my scraps.)

Put the adhesive side down on the crown.

C0C776B9-6A10-4F27-AAE1-98455E0CEB7D_zps

Iron with damp buffer cloth.  Flip over, and iron again.  And then you're all done!

CE27F3C3-608D-4F6E-AB0C-57A03FD35F51_zps

276D072B-1C5B-460F-BF9E-F2BB529C9AE4_zps

F6C7D543-D666-44A8-B561-F1504AB06315_zps

This was a VERY easy project.  It took about an hour, or an hour and a half, from start to finish.  The fleece made it super easy to cut and sew pieces together.  The hardest part was getting Friday to stay still long enough to try it on!

Maybe now I'll have to make Mr. Smith Bowser.  Hmmm...

~Buttons