Showing posts with label dachshunds. Show all posts

Tuesday, May 24, 2016

Dachshund Wrist Rest

Buttons, here!  Recently, I stumbled across a Pin that showed a cute keyboard wrist rest in the shape of a cat.  I thought it would be a fun project to try, and I also wanted to see if I could shape it like a dachshund instead!  It was the prefect time to make a present for Father's Day (my husband is a wonderful doggie daddy), so I got to work.

Materials:
Fleece (or some other easy to work with fabric)
Sewing machine
Hot glue gun
Stuffing/Padding

First, I cut out brown fleece into a rectangle for the body of the dog.


I didn't really measure, only guesstimated the length of the keyboard.  Next, to make it look like a dachshund, I cut out two rounded back legs.  Our dachshund likes to lay flat on his stomach with his legs poking out like drumsticks.  I wanted to mimic that here.


Again, I just cut.  I have a lot of left over fleece, so I wasn't too concerned with making mistakes.  Plus, the pieces were so tiny, I was cutting from scrap pieces of fleece anyway.  I cut out a long, slightly curved tail.


Using the back feet as a template, I cut out two front feet.


Next, I had to get the shape of the head.  Dachshunds are well-known for their very pointy noses, so I wanted to make sure the snoot was emphasized.  I also cut out ears, thinking it would add more depth to the project.


Using black fleece, I cut out oval eyes and a rounded nose.


 Now for sewing it all together.  First, I turned the body inside out, right side to right side.


Next, I stuck the back legs and tail inside.  This is going to create a pillow type closure, which we will turn inside out, hiding the seams.


Sew it shut.  This can be tricky if you're using fleece.  My sewing machine occasionally has a hard time getting through all the layers.  Just go slow and hand pedal if needed.


After that, sew up the long side.  That will create three closed sides (two sewn, one the natural fold in the fabric).


Now you can turn it inside out and pull the legs and tail straight.
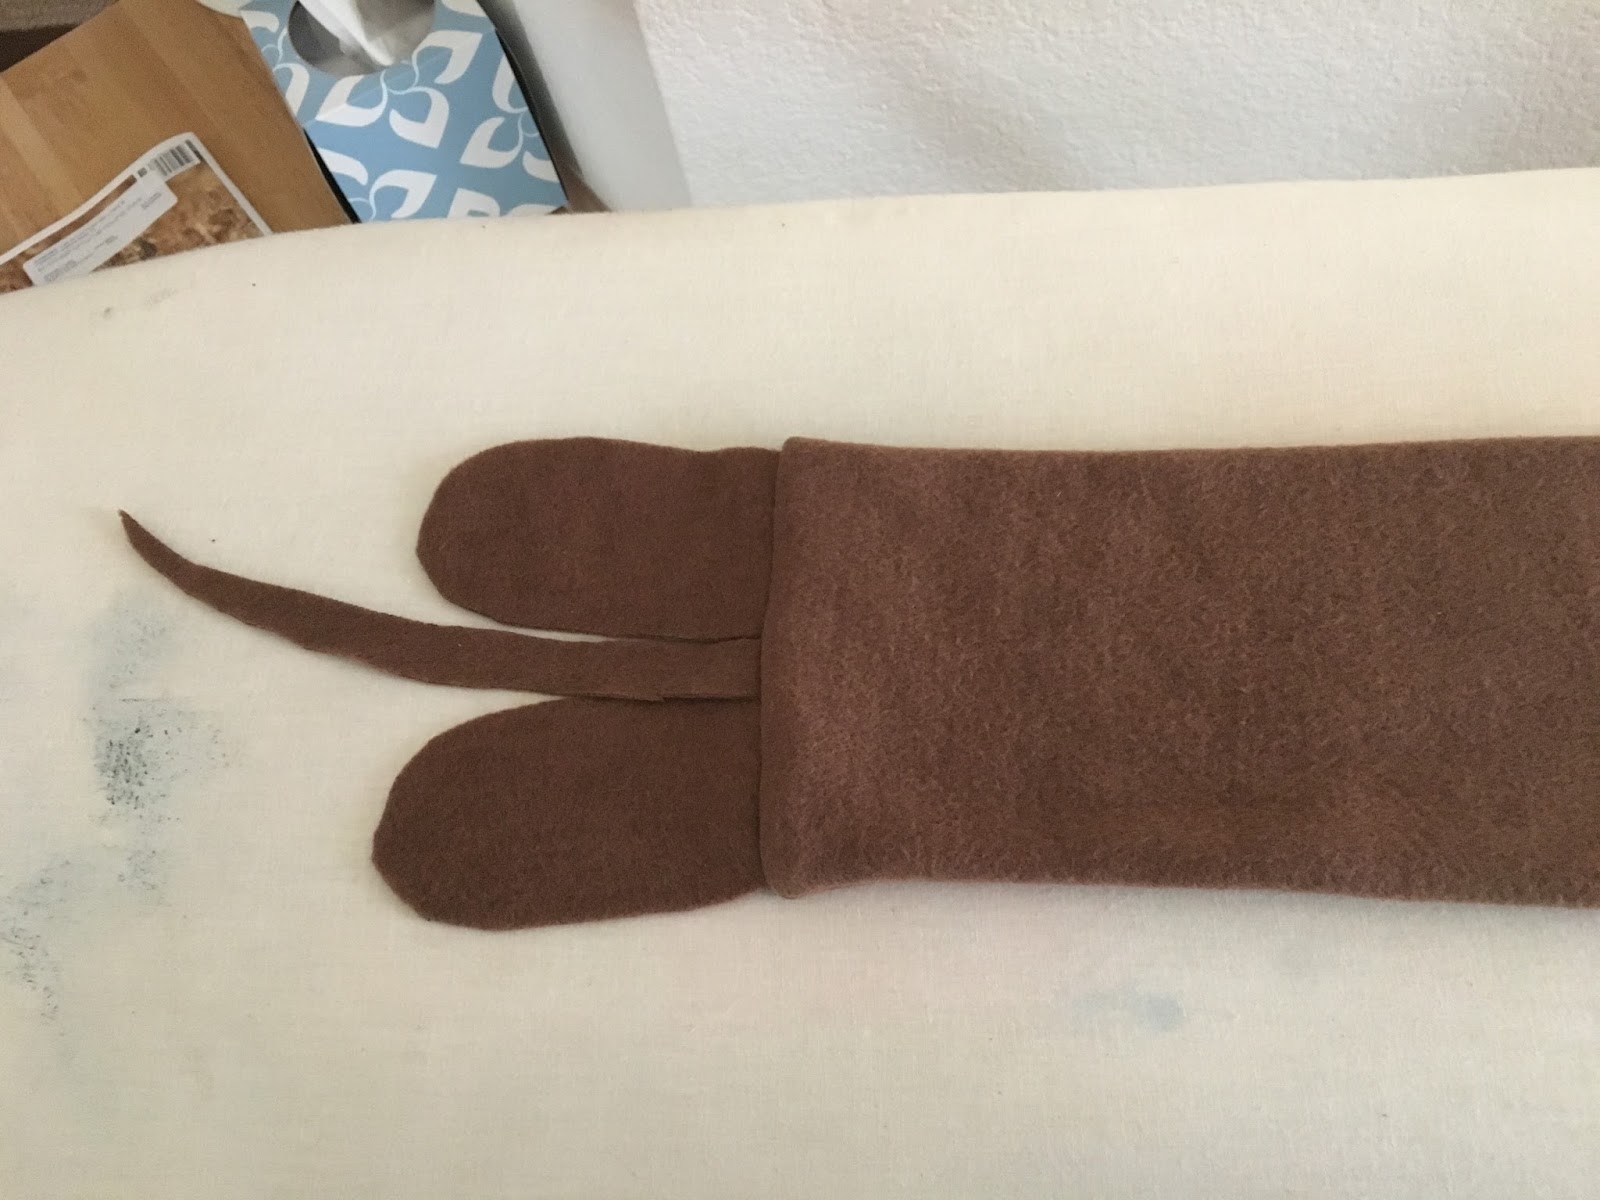

For stuffing, it's personal preference.  Using polyfill would be fine; I also some some tutorials that used rice.  I had some left over padding that seemed the right fit, so I chose this.  It's not as thick as polyfill would have been, and not as heavy as rice.  I think it'll work for my needs.


Cut off any extra fabric.  I was sad to do this since dachshunds are notoriously long.  But my padding piece was too short.  Then, tuck the seam inside the body and stuff the front legs in too.  Sew it shut.  This doesn't need to be a pretty seam since the dog's head will cover most of it.


I didn't really care for the way my dog's head looked.  Plus, I wasn't sure how to assemble the ears onto the face without it looking weird.  So I used my existing head and ears as a template and re-cut the head into one piece.


Using a hot glue gun, I adhered the eyes and nose.  Then I glued the head to the top of the body, covering the seam and a small portion of the legs.

And there you have it!  A cute, super easy wrist rest!  It took me about an hour total of work and prep.


And here's my inspiration!  They're almost the same length!


~Buttons

Saturday, November 29, 2014

Dachshund Pajama Pants

I love all things Dachshunds, so when Pockets and I were out shopping yesterday, I saw this adorable Dachshund flannel print at Joann.  I had to buy it!

886C907F-E10B-4E20-B53B-7F868A931CE1_zps

I decided it would make cute and comfy pajama pants.  So I found a tutorial on Pinterest and got to work!

Materials:
About 2 yards of fabric
Thread
Sewing machine
Elastic

First, use an existing pair of pajama pants as a pattern.  Fold the fabric over and place the pajamas along the folded edge.

175038D6-3493-4EB4-A4E9-C6D90FB86E7D_zps

98D29C3E-EF82-4B1C-BDC7-EDD9B53B77E8_zps

I placed mine a little further from the edge so that the legs would be wider.

Next trace about an inch away from the pajamas; this will give you a seam allowance.

175038D6-3493-4EB4-A4E9-C6D90FB86E7D_zps
I used a pen, so the lines are a bit hard to see.

Next, cut the line, going through both layers.  It'll give you a weird looking piece like this:

96084113-54D8-4BB4-B52F-7C64BDB9A913_zps

Repeat on the other side of the fabric.

BA44E832-F988-48BC-99E8-88EE686BA8DC_zps
I just put the cut out pattern on the opposite side and traced it that way.

So you'll have to identical pieces:

CB0352B8-38D2-4AC2-9FD5-B6E4DF061CE5_zps

Place them together, right side to right side, and stitch only along the curve.

1800D1E8-7F97-4ED7-BEA4-9BFA206B69F6_zps

So it's only sewn together by both curves.

A1BF2E26-AA9D-4E3E-AF7F-B12F15DB19D5_zps

Now, open it up and place both of the SEAMS of the curves together.

ea9a2c1e-4224-4a1f-9f20-39e7bea858a6_zps

71A5FCAE-3642-4B53-AF16-D52E51E3D88E_zps

Next, sew up the curve of both legs.  I started at the middle and went down each leg separately, but you could do it from one leg up then down to the other leg.

B014879D-306E-4F88-B148-6FCCA594B79A_zps

Flip it right side out, and sew up each leg's hem.  I folded it under twice, then did a double hem.

64AF1D14-A3B7-4C2B-9929-427127B1137E_zps
Make sure you try it on before stitching your hem.  You may need to take more or less depending on your height.

Next, pin the top hem down about an inch (or however much you need to make a pocket for your elastic).

8D024919-9C97-49CB-BD26-218958B21CF0_zps

Sew all around the top, leaving only an inch open.

F48B1402-7818-4682-9FAC-E53B5803C350_zps

Use a safety pin to get the elastic through the sewed up pocket.  Sew the ends of the elastic together.

D9107F34-9C9D-45AF-B873-D35D7F6BCC4A_zps

Stitch up the last inch on the waist hem and you're done!

3E5D15AC-9D9A-4D3C-B51E-BC8A989571C3_zps

EE4B6A47-5F2E-40BD-80AF-E100CC570C15_zps

F524051A-1A82-4A77-B5AA-144939EC6C9F_zps

55B7193A-7DB4-4876-B4D9-3E269E9A7159_zps

They are oh so comfy!

~Buttons