Showing posts with label flannel. Show all posts

Friday, July 29, 2016

Mermaid Tail Blanket

I've seen several articles about mermaid tail blankets, yet most of them seem to be sites that sell them, not tutorials on how to construct them.  When I first saw these adorable blankets, I knew I wanted to make one for Pockets.  She loves mermaids!

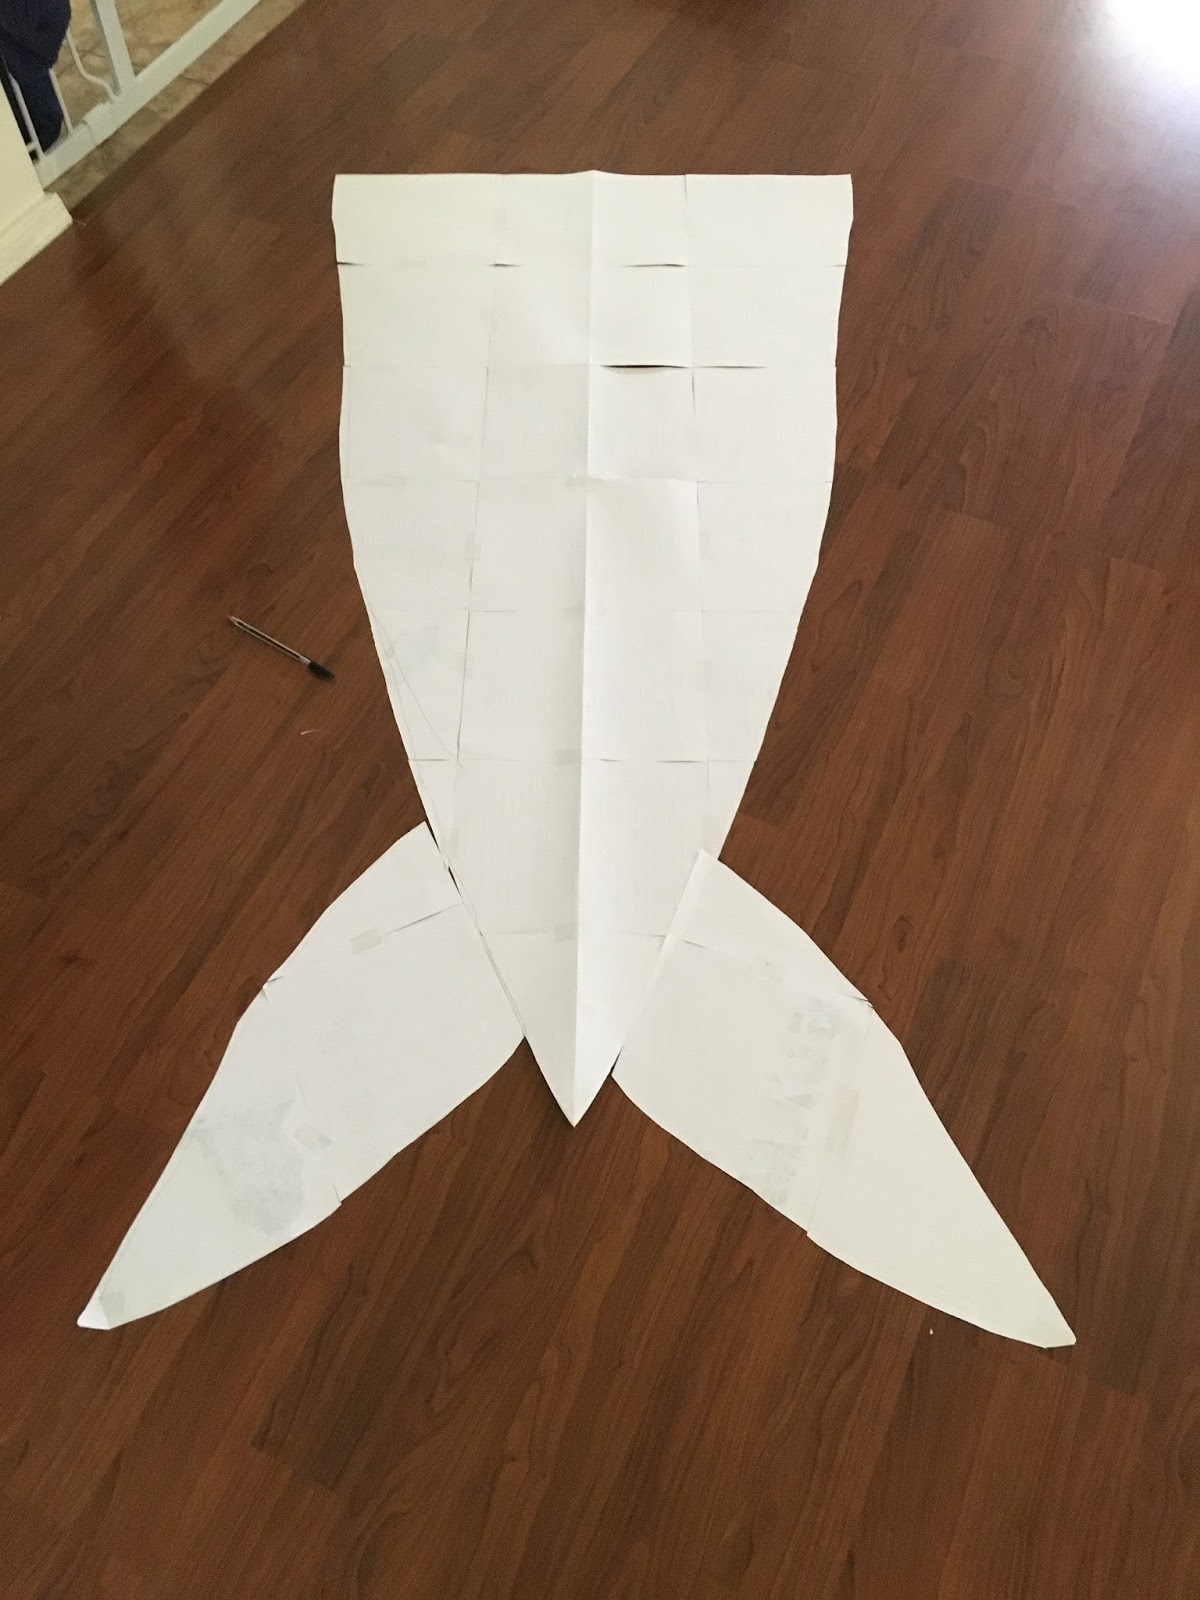
First, I had to come up with a pattern.  I taped old printed pages together and outlined how I thought it should look.


Once I got it about right, I folded the pattern in half (hot dog) and cut it out.  This ensured that both my side slopes were even.


With the left over pages, I made a pattern for the fins.

Next, it was time to start cutting out my fabrics.  I found this soft, light, jersey knit that reminded me of scales.  I used this for the tail.


For the fins, I used a solid green knit.
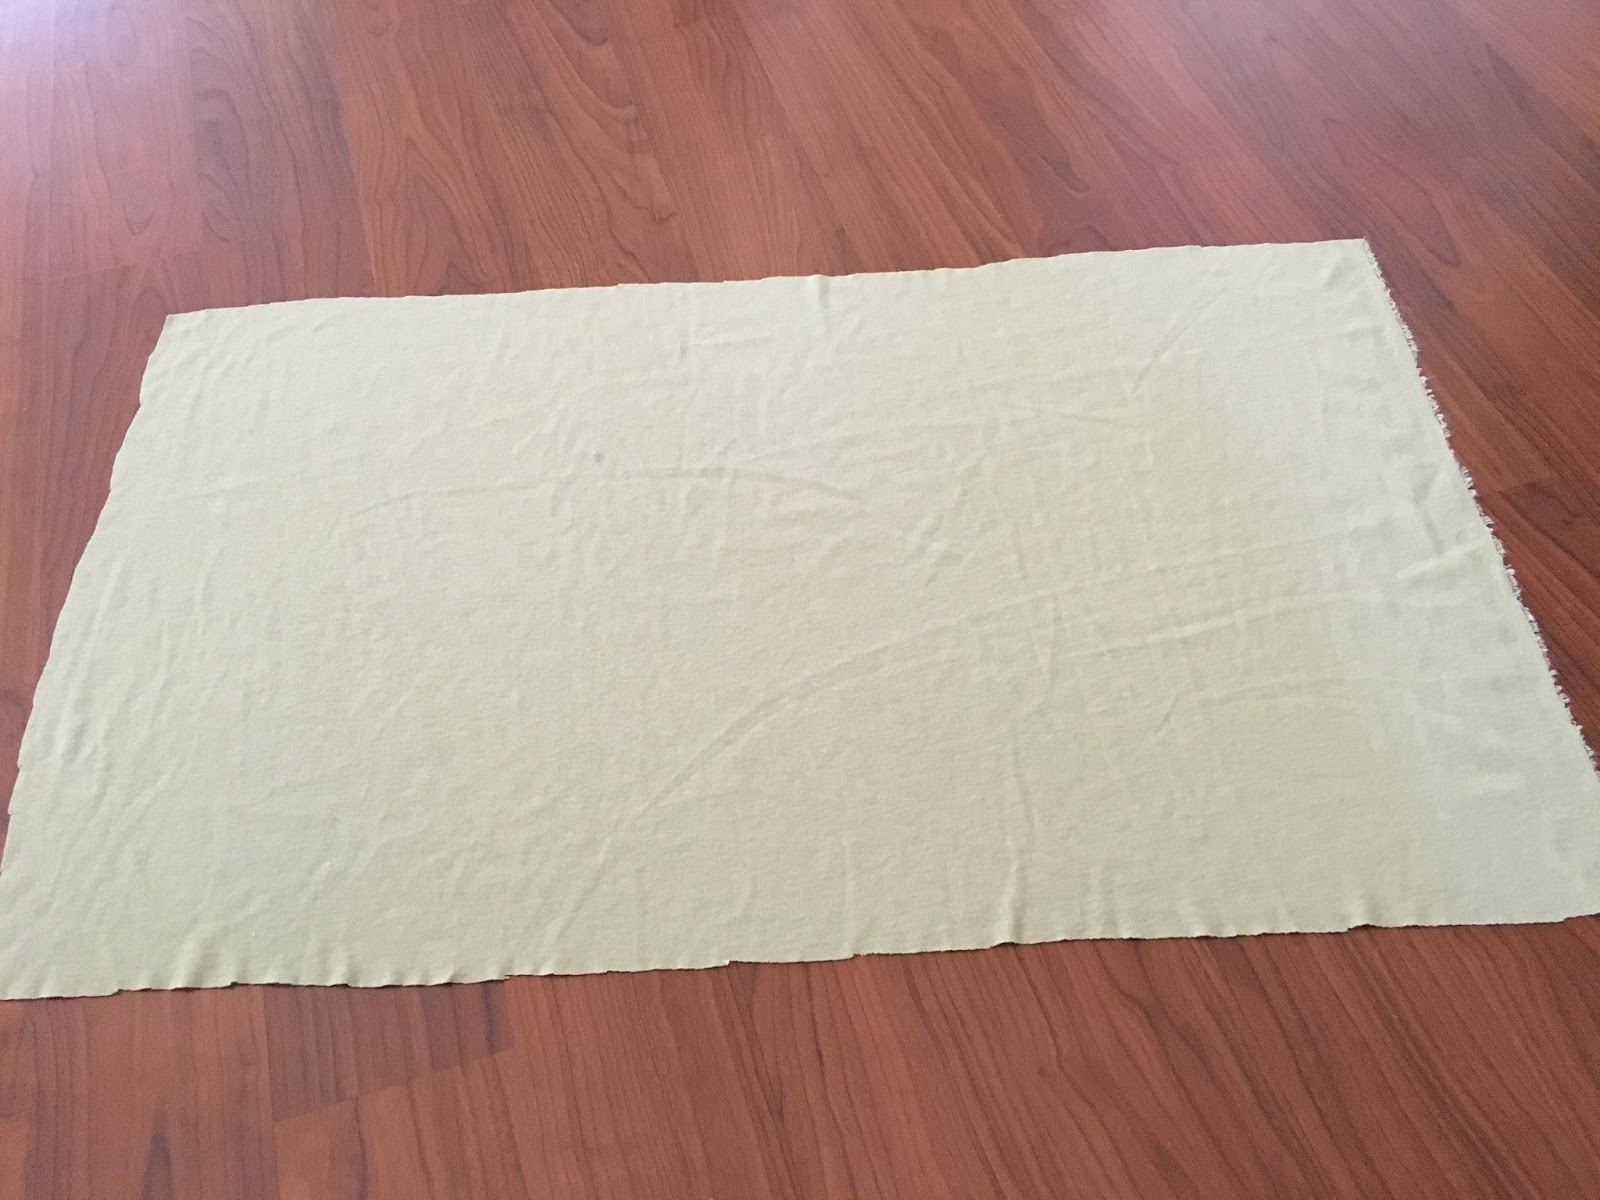


With my pattern atop the fabric, I cut it out, making sure it was aligned as straight as possible.


Then, I flipped the pattern upside down and cut out another piece.  This allowed me to get both pieces out of only a yard of fabric.


After that, I assembled my fin patterns atop the green knit.  I cut out two of each fin at the same time.


After they were cut out, I kept them together to ensure that I could make sure they wound up mirroring each other on the final product (more on that in a bit).


I set up the fins where I wanted them to go (about three inches from the bottom).  Now, I had one piece that was the "front" of the blanket, and the other piece that was the "back."  The front and back need to be mirror images of each other since they will be sewn right side to right side.  To ensure that this happened, I took the right fin on the right tail and flipped it to the left fin on the left tail.  That would mean when these two pieces line up on top of each other, they fit perfectly.  (Even thought both fins were traced from the same pattern, I figured there would still be little inconsistencies.)

Next, I pinned the fins in place, laying them right side to right side with the tail fabric.


Once all the fins were sewn down, it should look like this.


Next, lay the two pieces together, right side to right side.


Starting at the bottom, sew up the right side, around the fin to the top.  Repeat on the left side.  Leave the top open.


To finish the top seam, I used a thin, black bias tape.


And since I had the pattern, I made another one!  The second was flannel.


~Buttons

Friday, June 5, 2015

Polka Dot Border Skirt

I think I need to stop making skirts.  It seems like it's become an obsession.  Probably because they are so easy.  I'll try to focus on more non-skirt items as my summer continues.

Anyway, I found these two fabrics in the remnant bin at Walmart for less than $2 apiece. The purple is sort of a knit, the kind used for maxi skirts.  It's so soft and comfortable!  The polka dot is a flannel.  I'm not sure about the rules of combining different fabrics, but I don't care; they looked so cute together!

5567860B-7A32-4FDE-9D2E-25373203E47D_zps

The first thing I did was decide my skirt design.  I played with the idea of doing panels again, but since I just finished a panel skirt--and I wanted to do something quick and easy--so I decided against it.  The best way to do this was to add a simple polka dot border around the bottom of the skirt.

0546739F-0FB2-4DE8-A2A3-21826F17A6ED_zps

I cut my purple fabric in half, giving me two (relatively) equal pieces.  Then I cut out bands of the polka dot, 5 inches long by 40 inches wide.

9B65CC56-3FAB-45A3-9076-FCF6A5A30211_zps

Starting with the polka dots, fold the hem of one side up half an inch and iron.

A52B8CEA-C5E4-4CC2-BD1F-F9F15D6530C3_zps

Fold up again, and iron.

2CC63447-E103-4995-9BAF-6DD1686BB671_zps

 Stitch the folded hem.  I used a double stitch, and a contrasting purple thread.  Repeat for other band.

4E7E501B-F272-4CDE-9DC7-B787CA89B02D_zps 

3FAAAFFC-8F90-4F61-970A-931B0B588640_zps

Pin the band to the purple fabric, right side to right side.

89F7A507-ACFC-47D9-B7AF-8296937F3CBD_zps

Sew together and you get this.

30BCE975-6B41-4CF3-8A76-A732DFA05D93_zps

Repeat for other band and purple fabric panel.

Since this purple fabric was so wonky--I've never worked with this before, and I didn't realize it would be so difficult to control; it wouldn't lay flat, even when I ironed it--I measured my skirt from the bottom.  I aligned my bottom hem and pinned the two purple panels together, completely ignoring how they aligned on the top.

Then, sew the panels together.  I even added a zigzag stitch to the inside seam afterwards to give it more support.

04E60450-A83C-4BB1-B6D9-7760AFC6906C_zps

Once both sides are stitched up, it's time for the top hem.  I folded down the top to give me an even and straight line, also leaving enough room for my elastic band.

72C84AC3-616C-40C5-A0C7-A3B8FAF4633F_zps

Sew the top hem, leaving an inch long gap to stream the elastic through.

8C56EEC9-C020-4DB3-8DA2-94F398F54C03_zps

With a safety pin, thread the elastic through the opening in the hem.

DFA86C7F-9DFB-493A-87CA-973A9F980518_zps

Sew the elastic ends together, overlapping them about an inch.  Complete the seam for the hem, and you're finished!

01F67DD4-71D3-4B5C-A20E-E07D192AF5D6_zps

This was an incredibly simple project.  The only thing that slowed me down at all was the uncooperative nature of the knit fabric.  Still, I love the way it feels, and the way it flows so well, so I will have to try another project with this material!


~Buttons

Saturday, November 29, 2014

Dachshund Pajama Pants

I love all things Dachshunds, so when Pockets and I were out shopping yesterday, I saw this adorable Dachshund flannel print at Joann.  I had to buy it!

886C907F-E10B-4E20-B53B-7F868A931CE1_zps

I decided it would make cute and comfy pajama pants.  So I found a tutorial on Pinterest and got to work!

Materials:
About 2 yards of fabric
Thread
Sewing machine
Elastic

First, use an existing pair of pajama pants as a pattern.  Fold the fabric over and place the pajamas along the folded edge.

175038D6-3493-4EB4-A4E9-C6D90FB86E7D_zps

98D29C3E-EF82-4B1C-BDC7-EDD9B53B77E8_zps

I placed mine a little further from the edge so that the legs would be wider.

Next trace about an inch away from the pajamas; this will give you a seam allowance.

175038D6-3493-4EB4-A4E9-C6D90FB86E7D_zps
I used a pen, so the lines are a bit hard to see.

Next, cut the line, going through both layers.  It'll give you a weird looking piece like this:

96084113-54D8-4BB4-B52F-7C64BDB9A913_zps

Repeat on the other side of the fabric.

BA44E832-F988-48BC-99E8-88EE686BA8DC_zps
I just put the cut out pattern on the opposite side and traced it that way.

So you'll have to identical pieces:

CB0352B8-38D2-4AC2-9FD5-B6E4DF061CE5_zps

Place them together, right side to right side, and stitch only along the curve.

1800D1E8-7F97-4ED7-BEA4-9BFA206B69F6_zps

So it's only sewn together by both curves.

A1BF2E26-AA9D-4E3E-AF7F-B12F15DB19D5_zps

Now, open it up and place both of the SEAMS of the curves together.

ea9a2c1e-4224-4a1f-9f20-39e7bea858a6_zps

71A5FCAE-3642-4B53-AF16-D52E51E3D88E_zps

Next, sew up the curve of both legs.  I started at the middle and went down each leg separately, but you could do it from one leg up then down to the other leg.

B014879D-306E-4F88-B148-6FCCA594B79A_zps

Flip it right side out, and sew up each leg's hem.  I folded it under twice, then did a double hem.

64AF1D14-A3B7-4C2B-9929-427127B1137E_zps
Make sure you try it on before stitching your hem.  You may need to take more or less depending on your height.

Next, pin the top hem down about an inch (or however much you need to make a pocket for your elastic).

8D024919-9C97-49CB-BD26-218958B21CF0_zps

Sew all around the top, leaving only an inch open.

F48B1402-7818-4682-9FAC-E53B5803C350_zps

Use a safety pin to get the elastic through the sewed up pocket.  Sew the ends of the elastic together.

D9107F34-9C9D-45AF-B873-D35D7F6BCC4A_zps

Stitch up the last inch on the waist hem and you're done!

3E5D15AC-9D9A-4D3C-B51E-BC8A989571C3_zps

EE4B6A47-5F2E-40BD-80AF-E100CC570C15_zps

F524051A-1A82-4A77-B5AA-144939EC6C9F_zps

55B7193A-7DB4-4876-B4D9-3E269E9A7159_zps

They are oh so comfy!

~Buttons