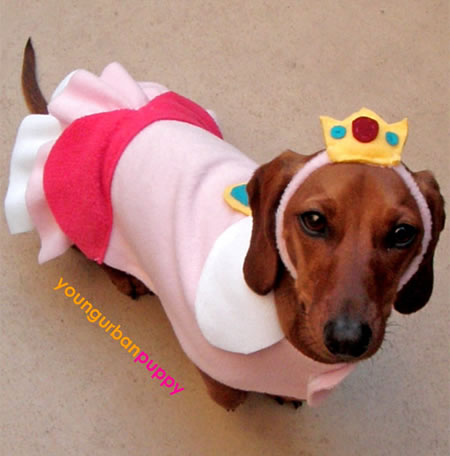
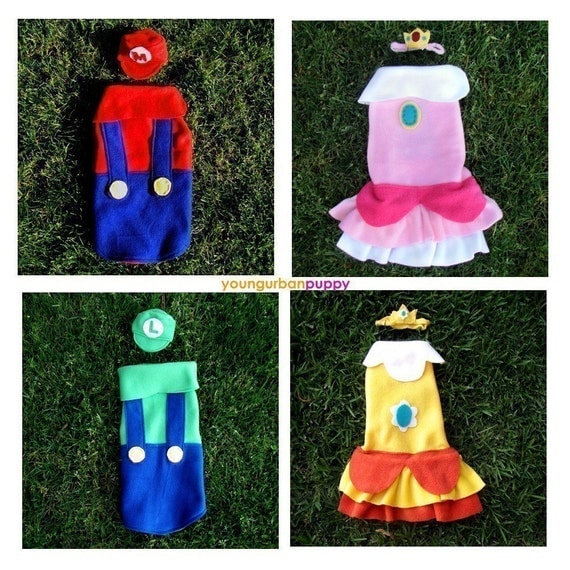
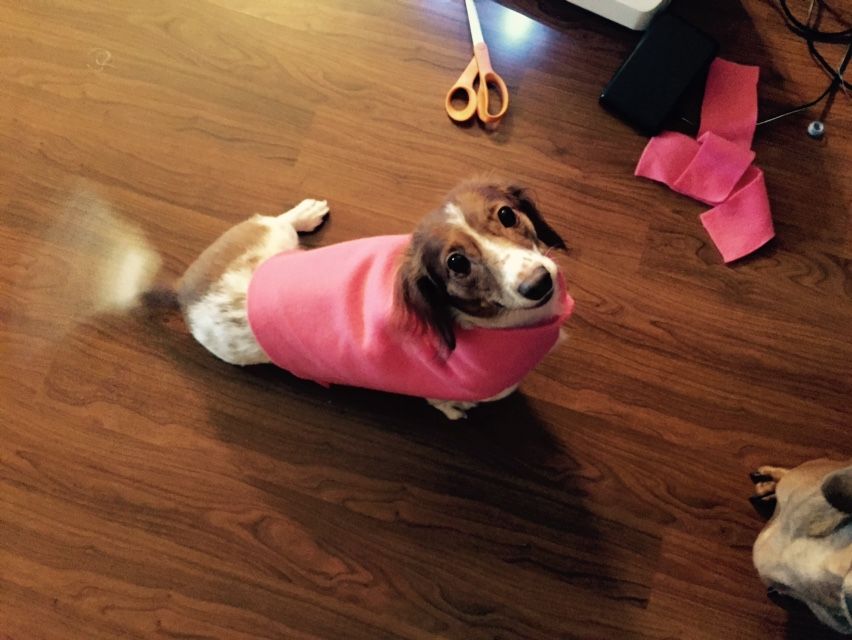
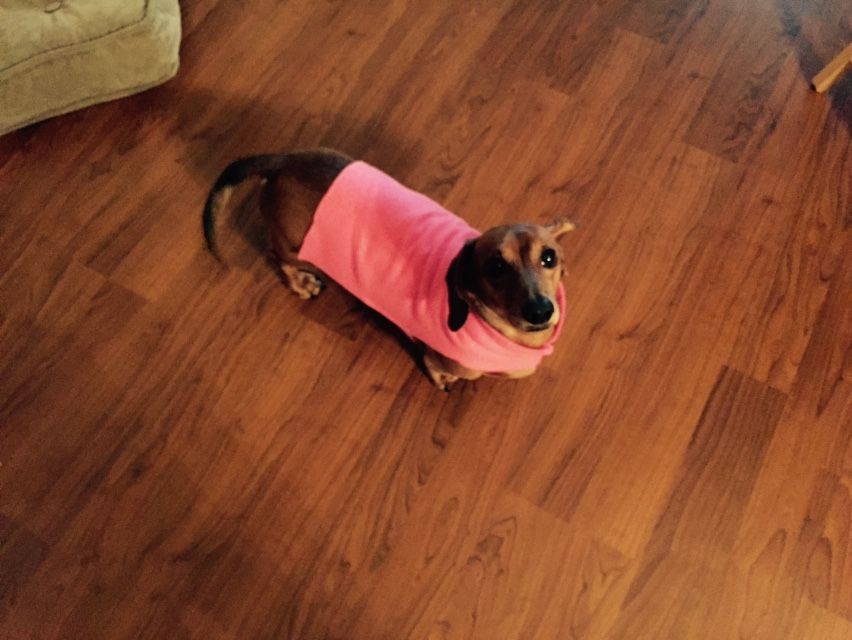
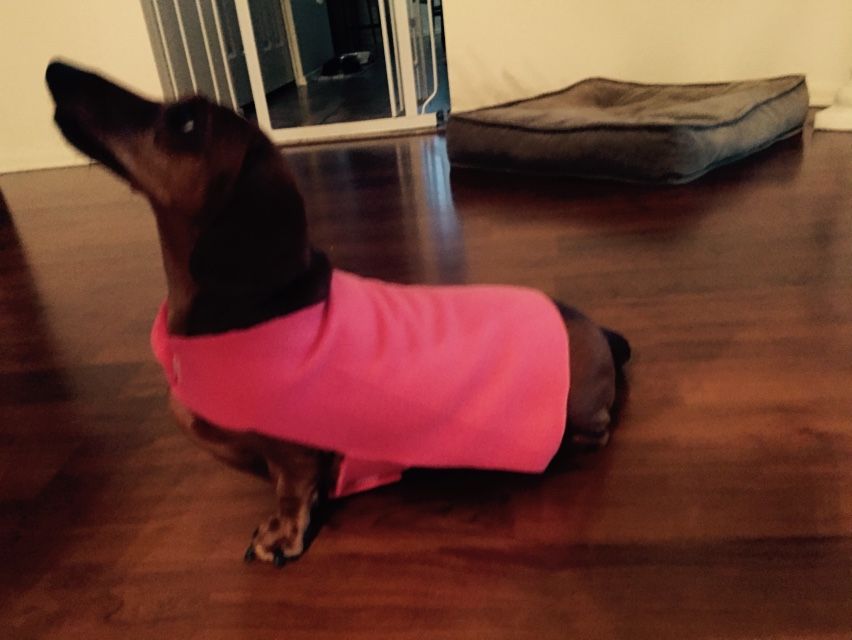
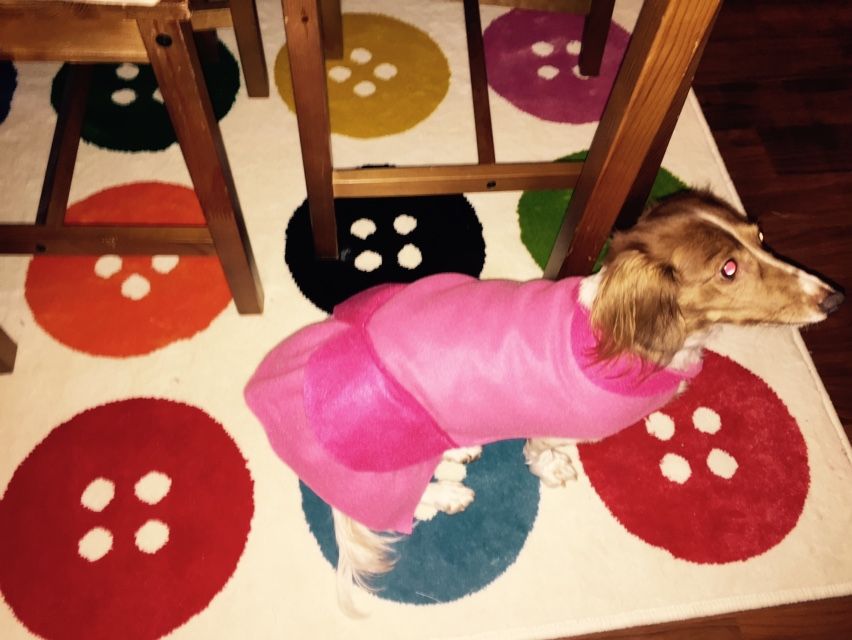
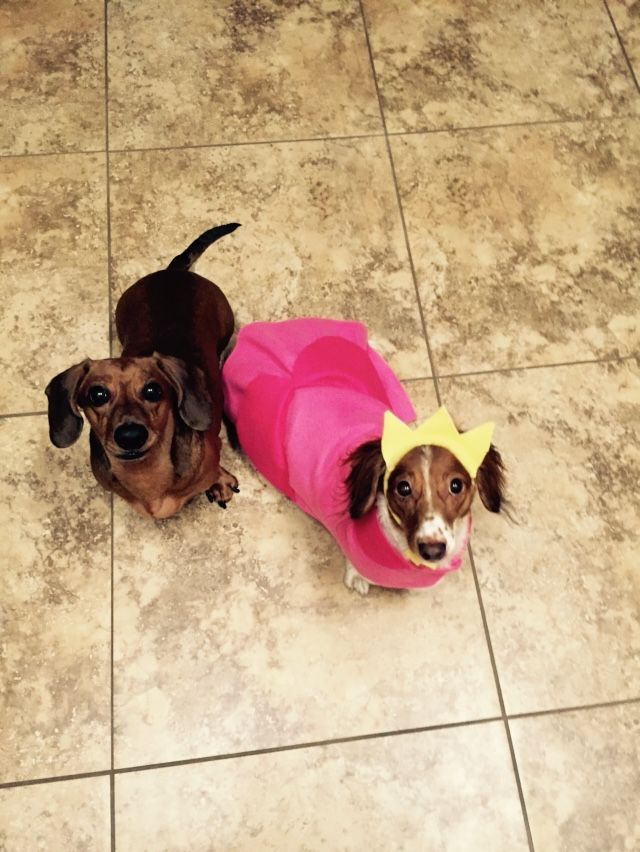
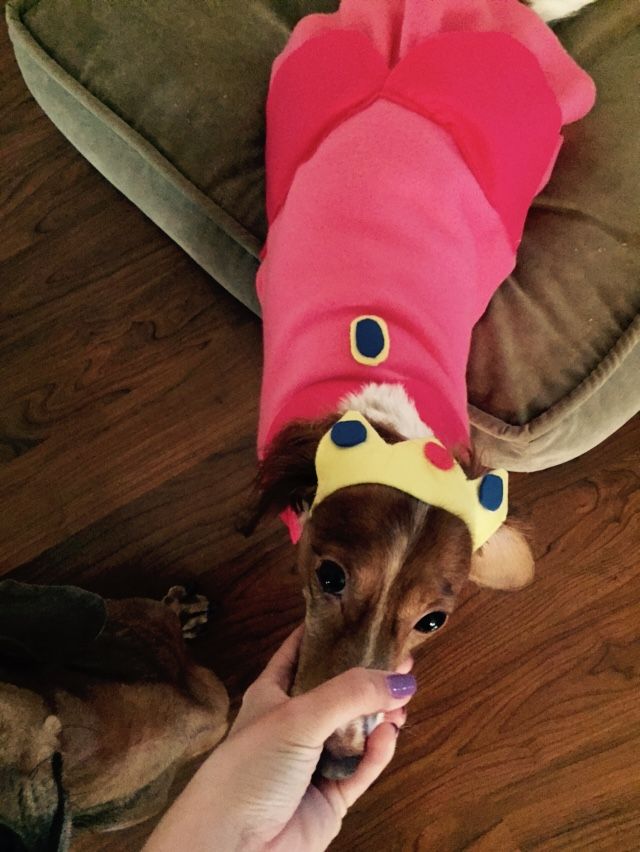
Anyway, I still need to make my Mario hat, and I'll try to get to it this week. Still, wanting to stick with the theme, I decided to make Friday, my 7-year-old female Dachshund, Princess Peach!
I saw this outfit on Pinterest (you can buy it from Etsy), but I wanted to try my hand at making my own.
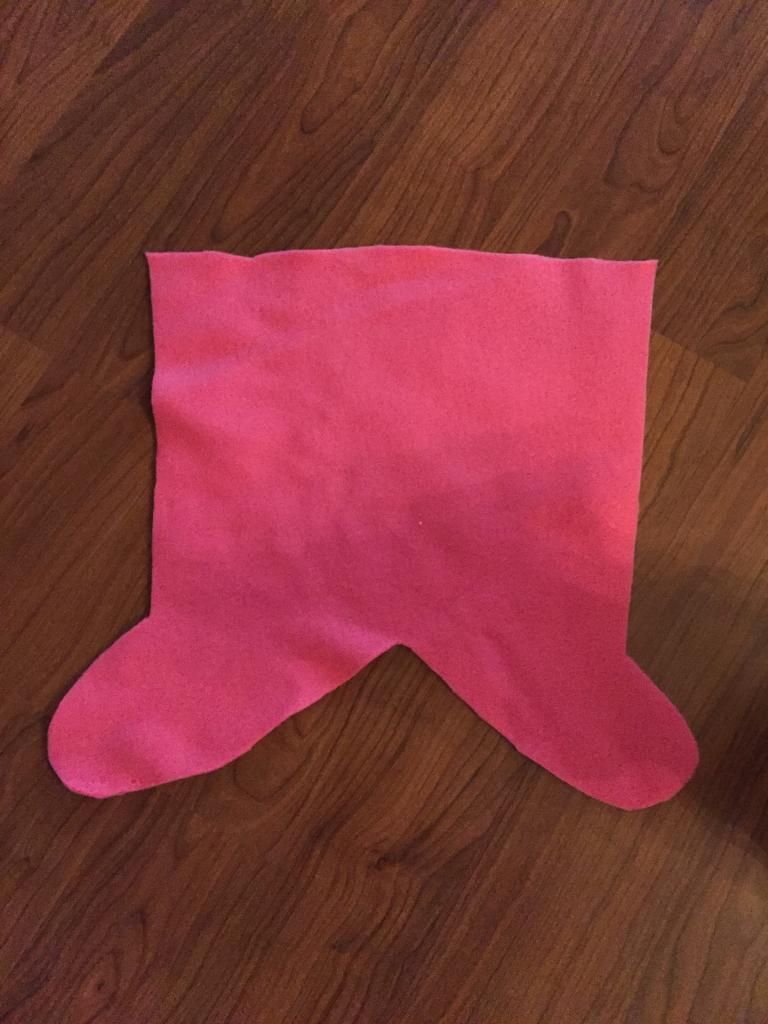
I chose fleece to work with because I already had a ton on hand (from my Pikmin hats over the summer) and because it's a very easy material to work with. It doesn't fray, so you don't need to worry about hems.
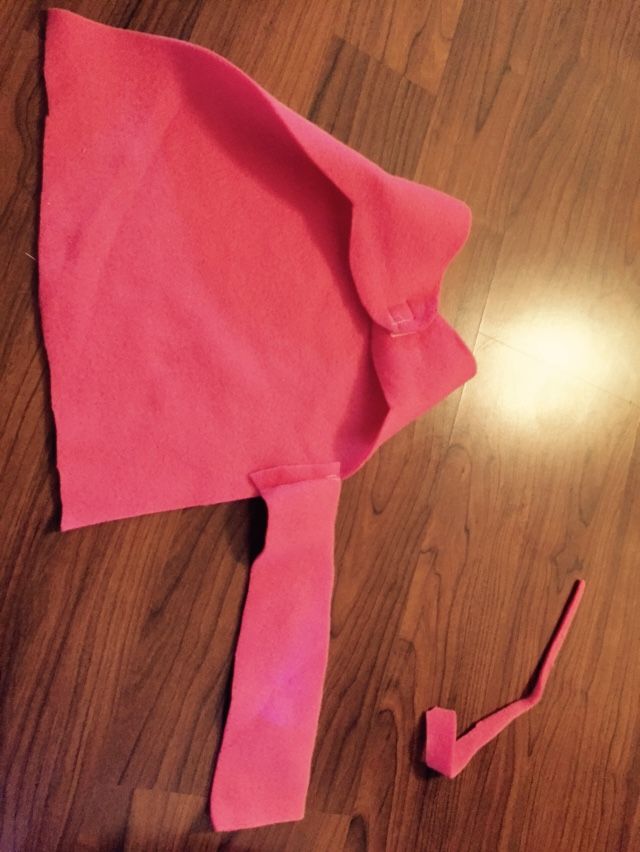
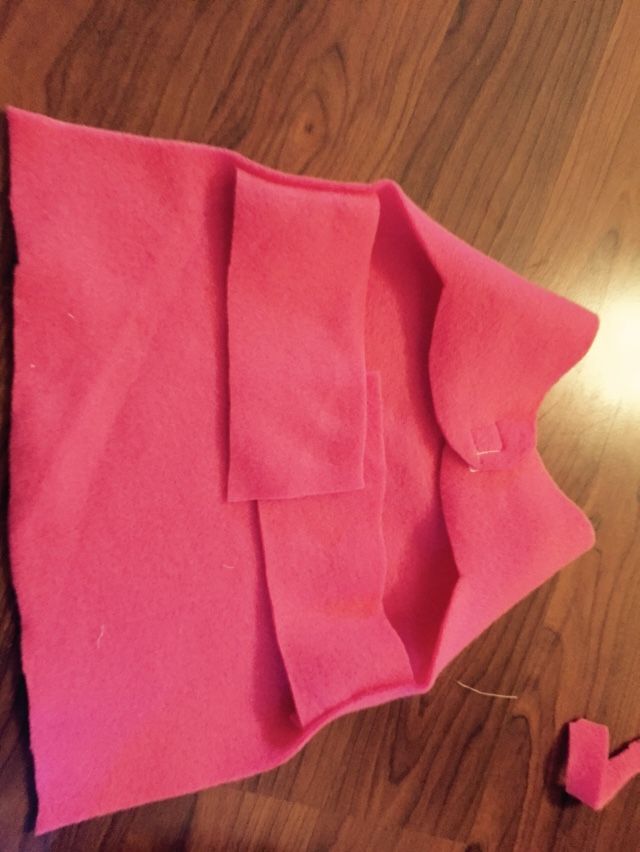
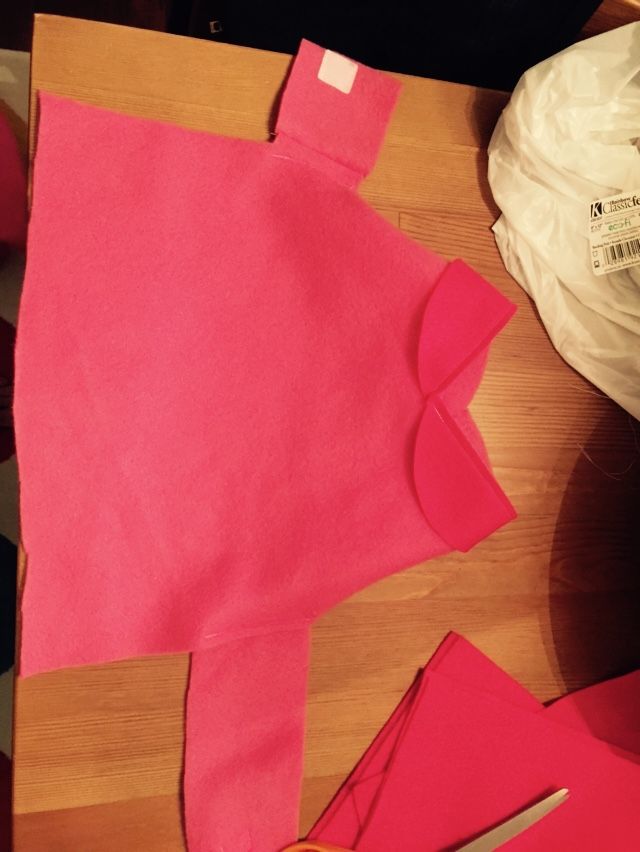
First, I cut out the body, going to form a loop around Friday's neck, then down to her hips.
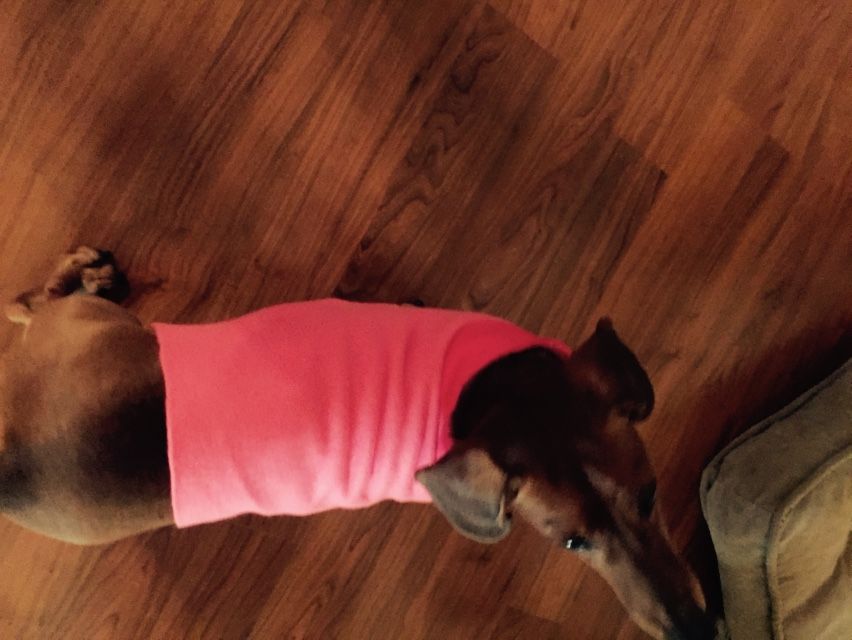
Friday is not the best model, so sometimes it was hard to get her to sit down. Because of this, Mr. Smith--my 8-year-old male Dachshund--got to try on his sister's pretty princess outfit.
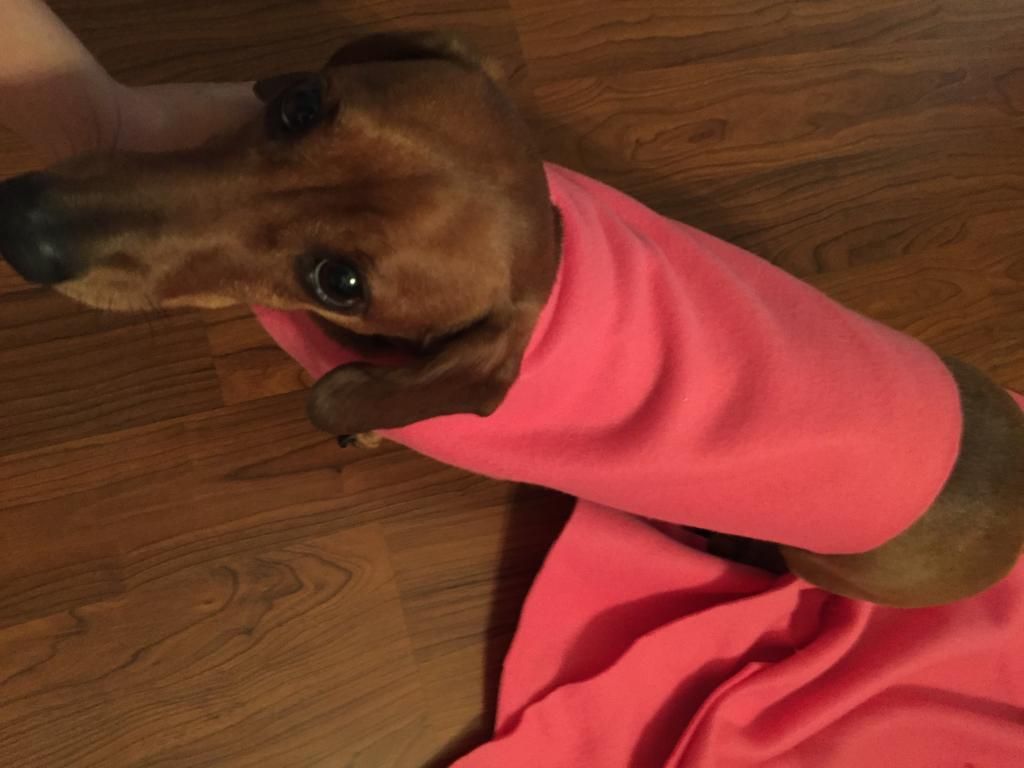
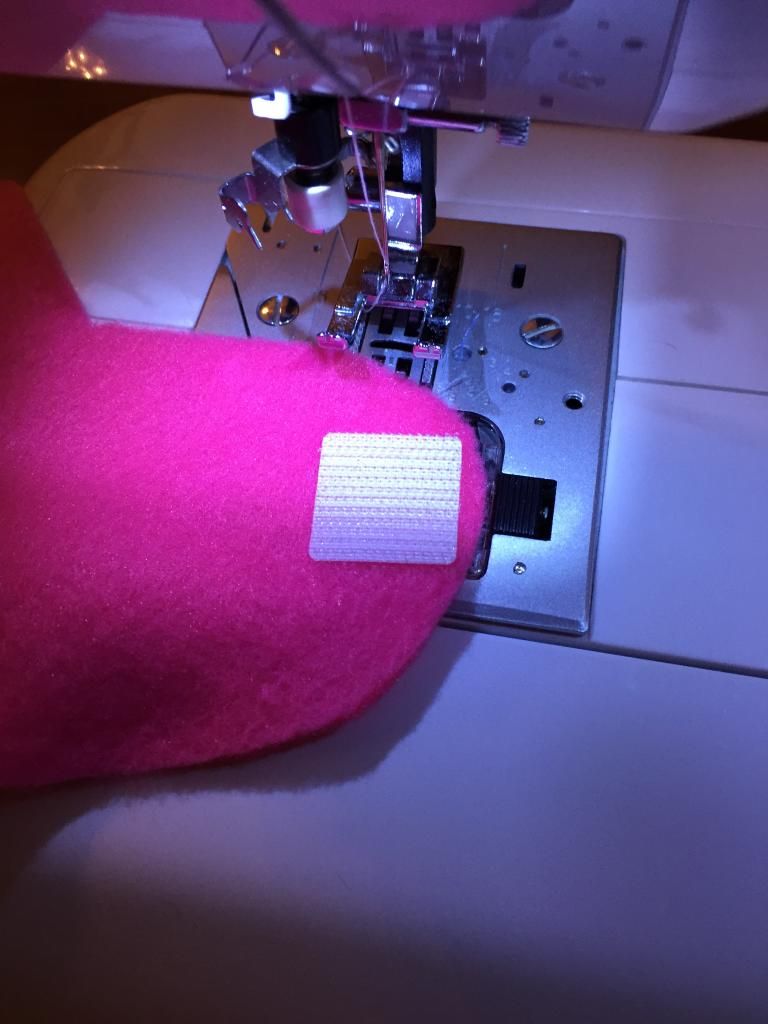
On the neck bands, I sewed two Velcro pieces--one inside, one outside--so the pieces would match up.
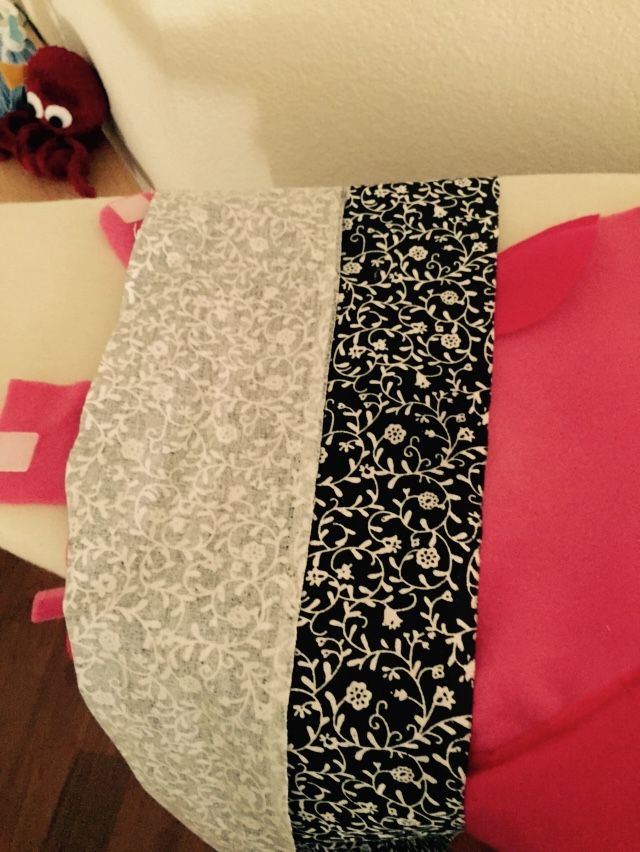
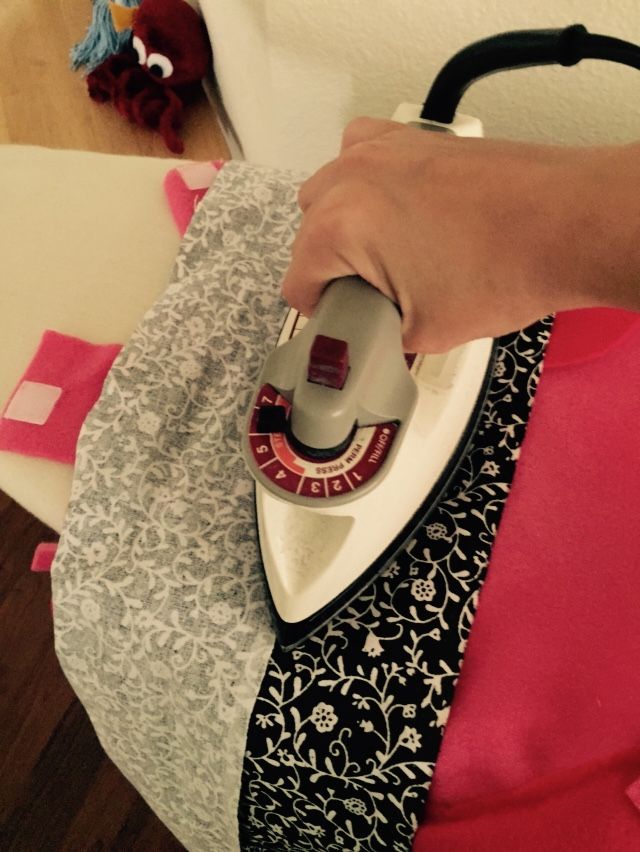
Next, I added a band around her waist to keep the garment in place. I sewed a strip to each side.
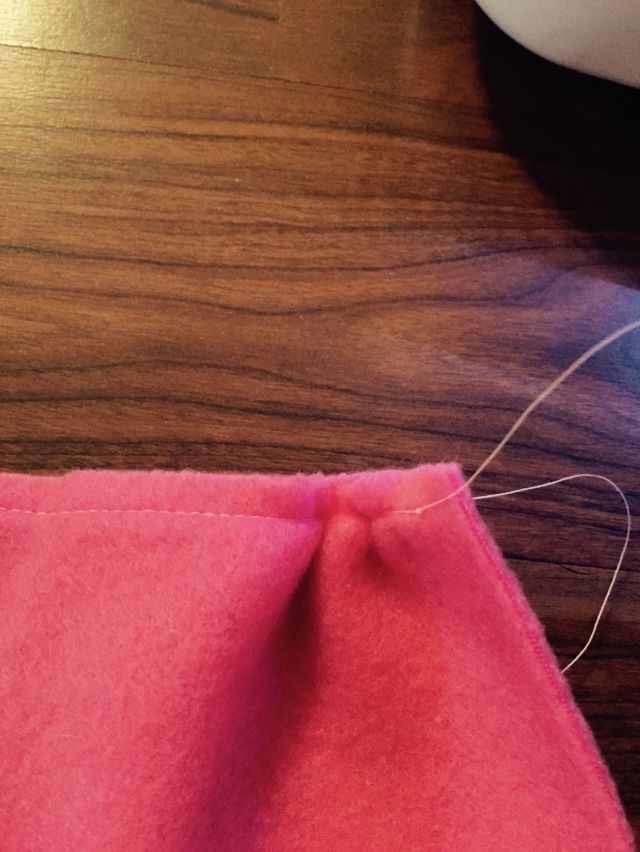
Found where they met in the middle.
Trimmed it.
Then sewed on Velcro pieces.
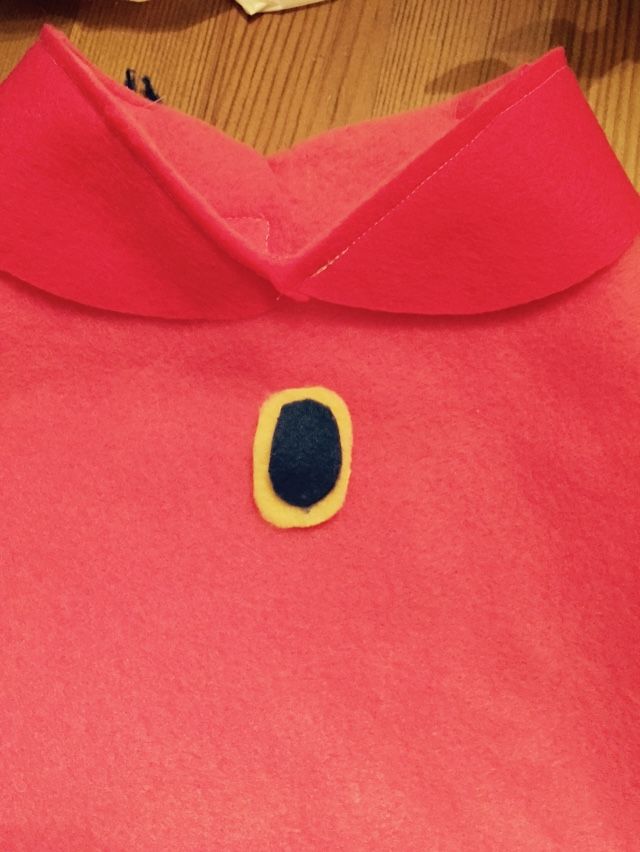
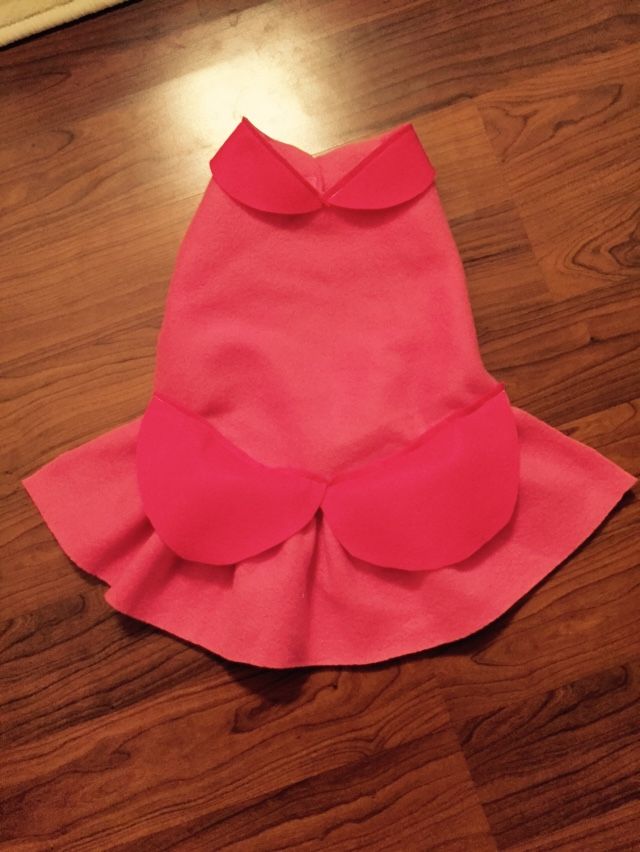
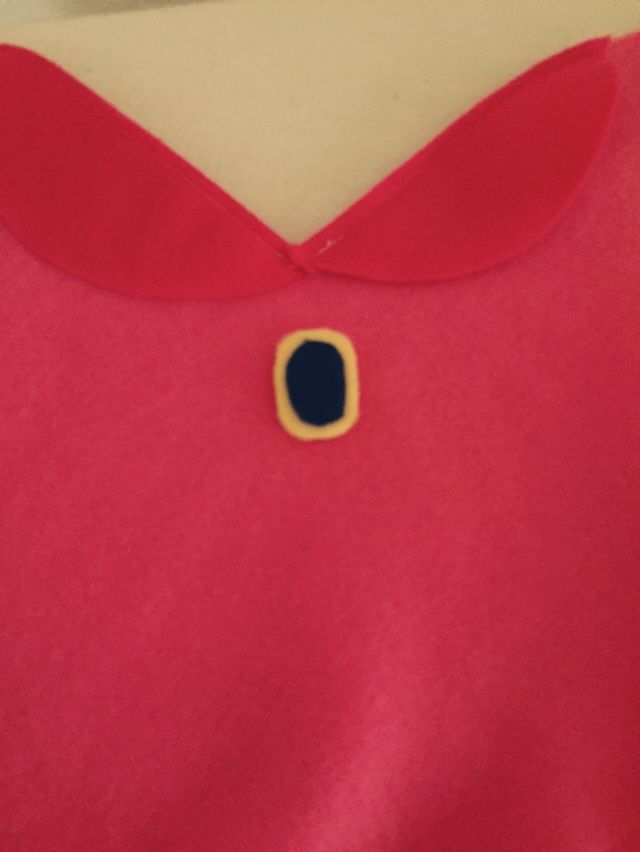
Now, I had to make the neckline. Peach has a dark pink collar at the top of her dress. For this, I bought four pieces of $0.34 felt at Joann. I cut out the pieces to be elongated half circles.
I sewed them both on with just a straight stitch.
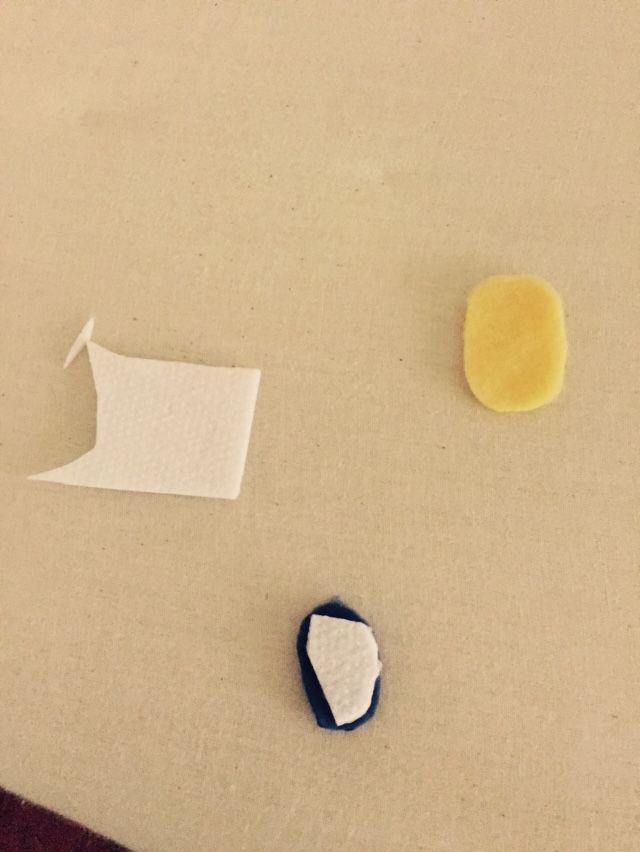
Peach also has a jewel on her gown. I cut it out of yellow and blue fleece.
But I saved adding it for later, because I used the iron-on method instead of sewing.
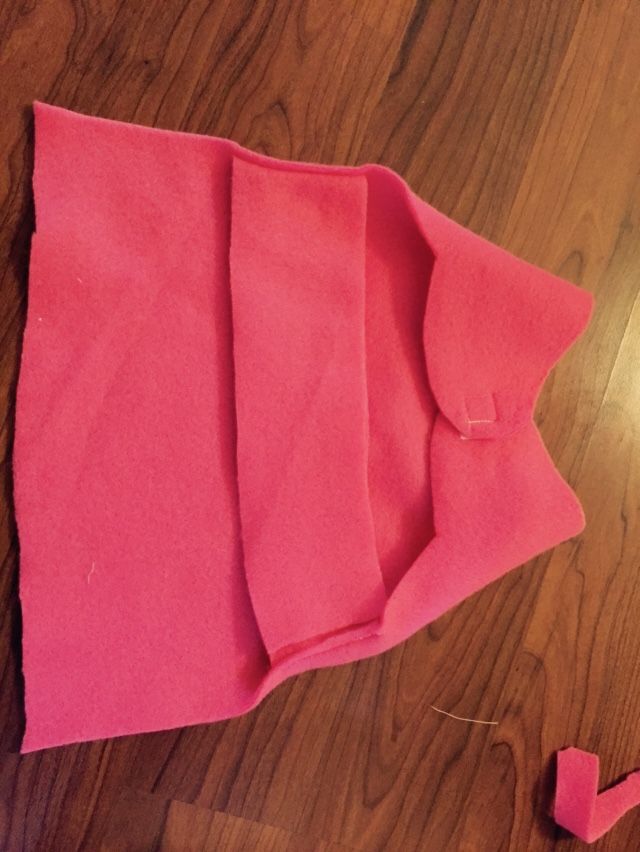
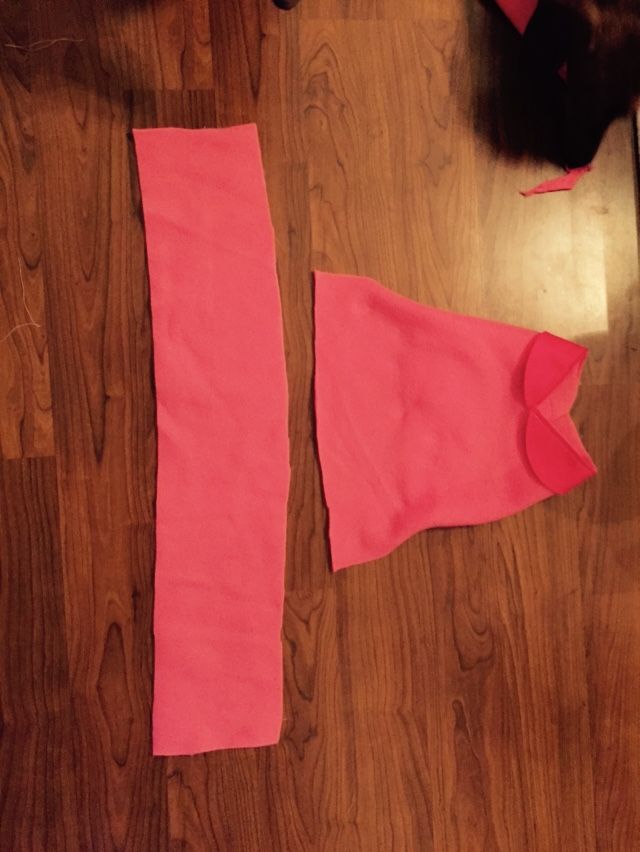
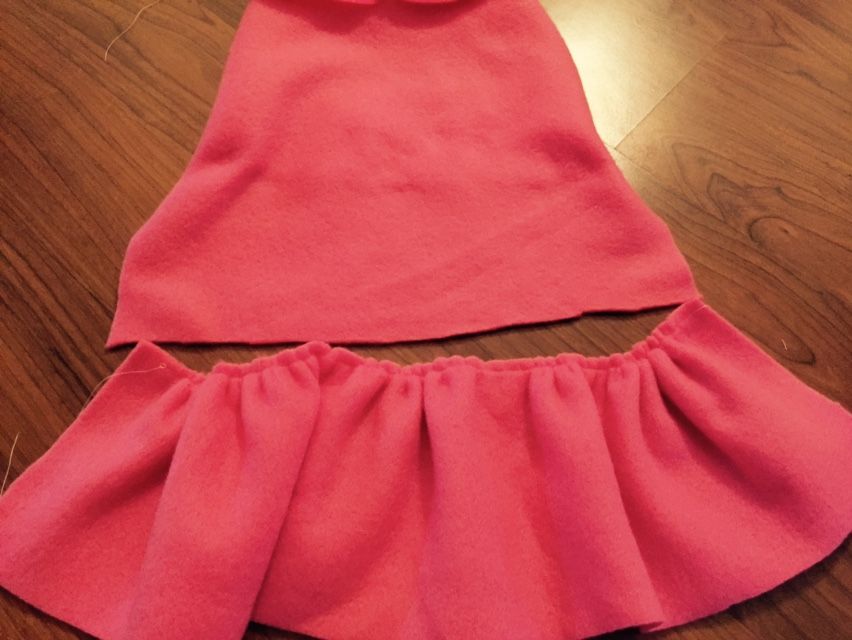
Now I had to make the skirt. I took the same pink fleece and cut out a rectangle that was nearly twice the width of the body.
I gathered one edge of the rectangle. To do this with a sewing machine, you can use a ruffle foot. I don't have that, so I had to gather it differently. I started by straight stitching a seam all along one edge of the rectangle. When you do this, you need to make sure the machine's stitch length is set to as long as it can go.
Then, once your stitch is complete (and DON'T backstitch at the start and end of your stitch; the thread needs to be loose, not set in place), pull on one piece of the thread to make a small gathered area.
Repeat this step, on both sides of the rectangle, moving the gathered portions towards the center of the material. Once the larger rectangle is about the same width as the body, stop.
Pin the skirt to the body and sew!
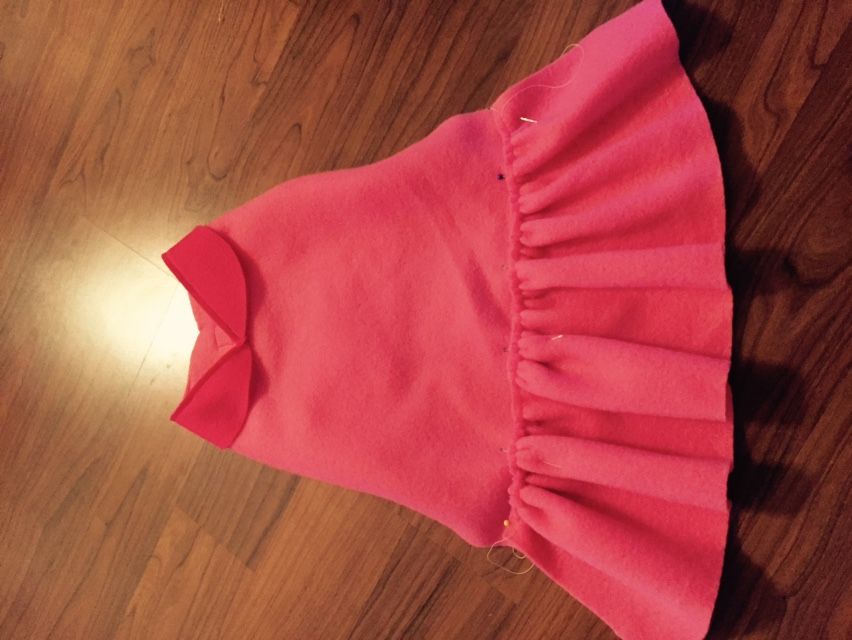
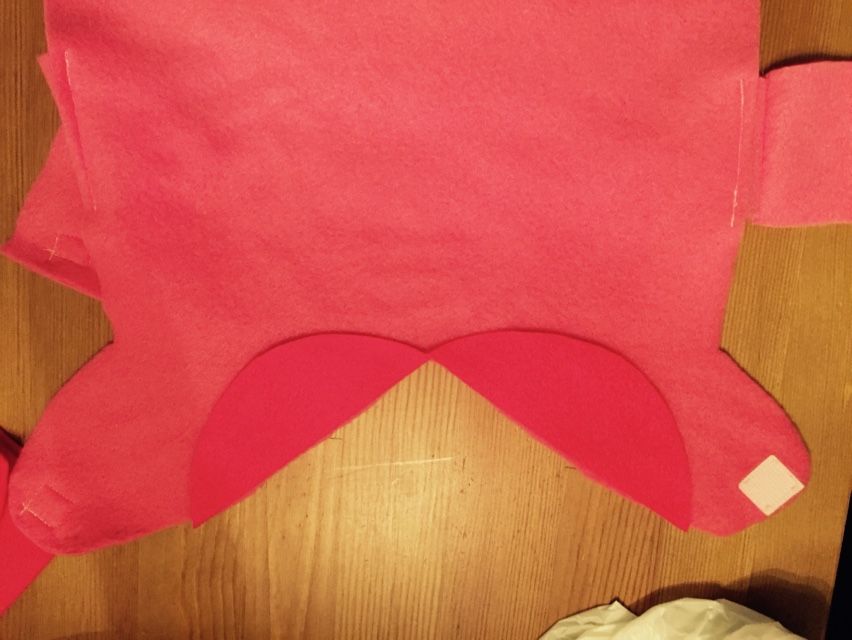
Now the skirt ruffles. The same sort of elongated half circles are used to create the skirt ruffle, but slightly bigger. This was the hardest part of the outfit, getting these sewn on, on top of the gathered section.
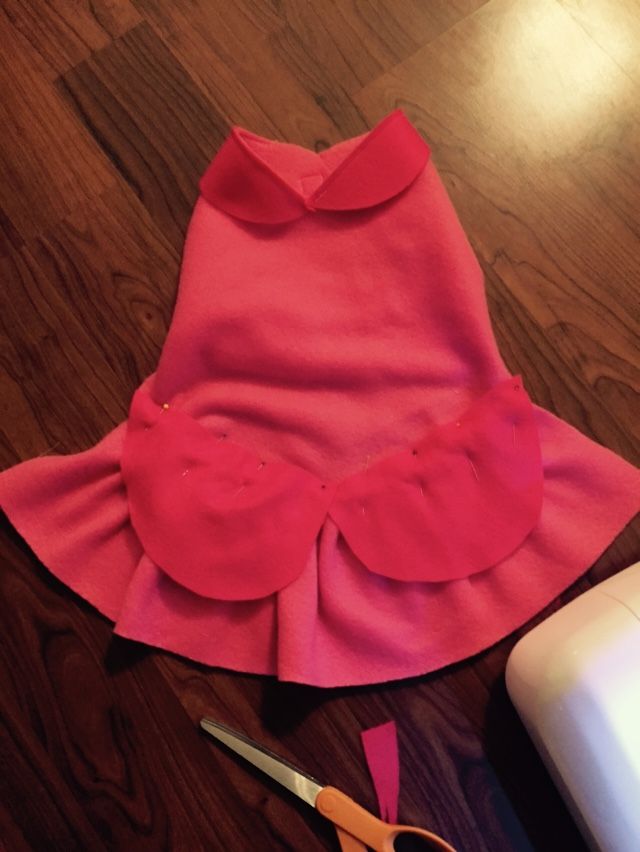
Sew on with a straight stitch.
(notice my buttons rug under my sewing table?) :D
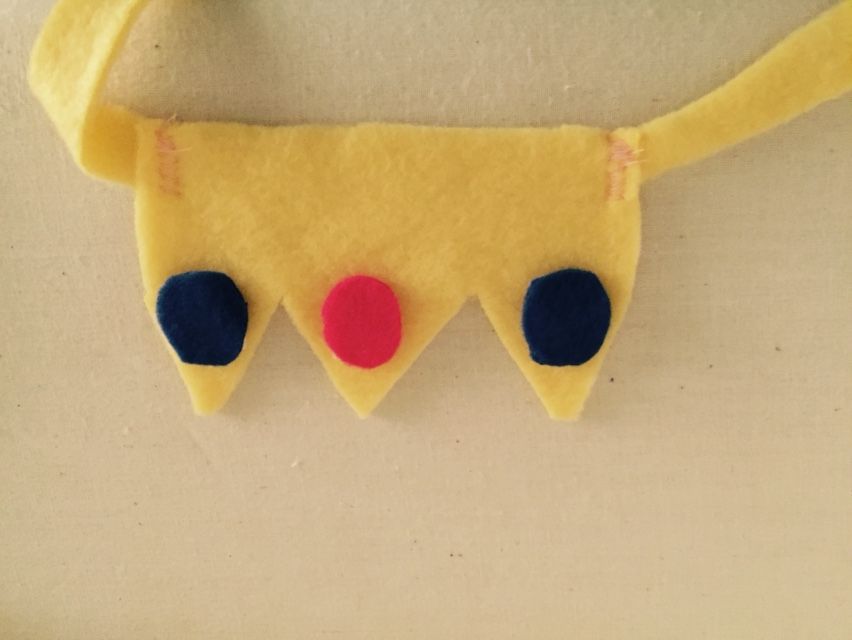
For the crown, I wanted a 3D one to sit on top of her head, but I needed felt, and I didn't have that in yellow. So I settled for a 2D flat piece. I cut out the crown with three spikes, then sewed on two skinny, long threads to either side. The threads could be tied under her chin to keep the crown in place.

Now for ironing on the jewels. I bought a bunch of iron on fabric (Pellon Peltex 2), with adhesive on both sides, so it fuses your materials together. It's very helpful when dealing with tiny fabrics.
I took my blue and yellow jewel for the dress and put the adhesive on the blue oval.
I placed it on top of the yellow.
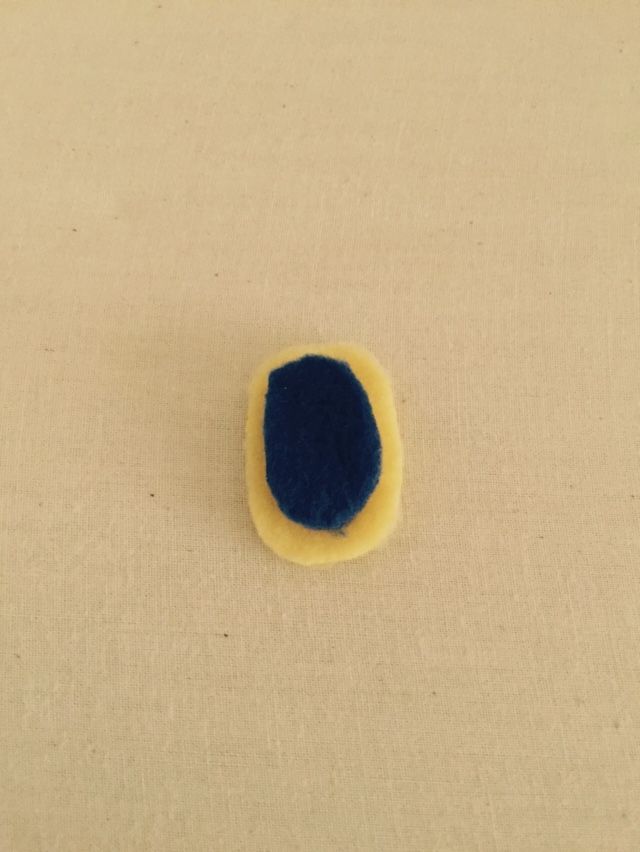
Then, I covered the fabrics with a cotton buffer cloth (fleece will melt if it comes into contact with a hot iron). Spray the buffer cloth with water, so it's damp, and iron.
Next, I flipped the jewel over, so the yellow side is face up.
I placed the buffer cloth back on top, dampened it, and ironed again.
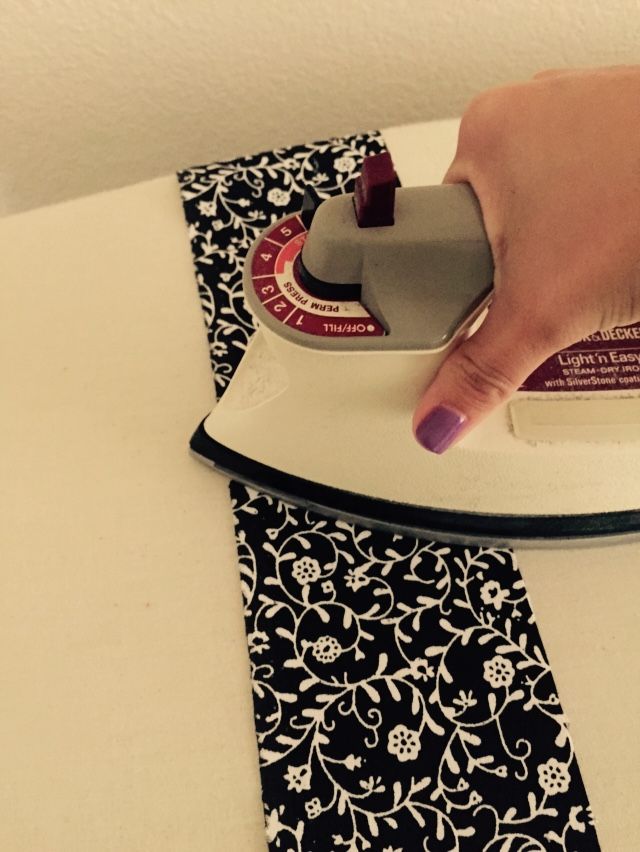
With another piece of adhesive, I placed it on the dress, and the jewel on top.
I covered it with the damp buffer cloth, making sure to cover ALL the fleece!
Iron.
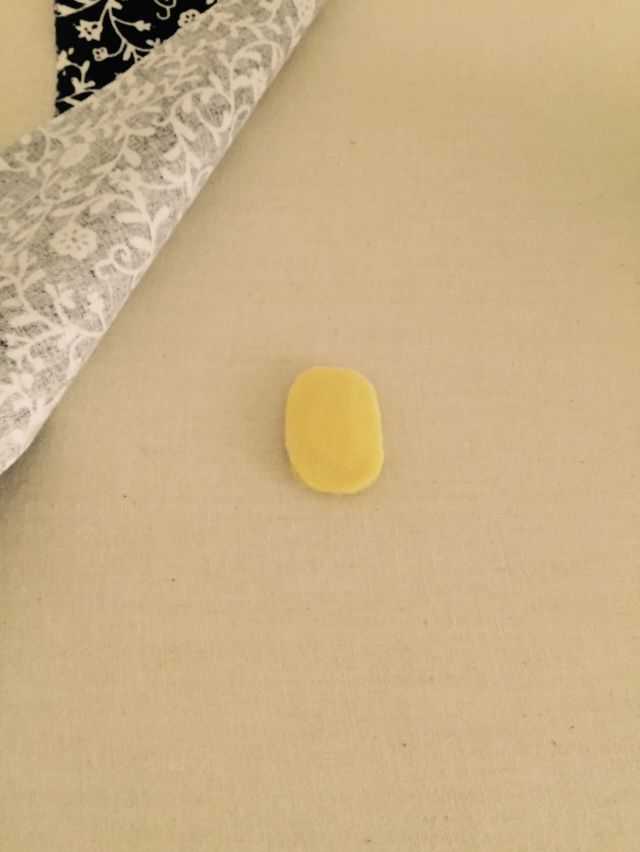
Flip over, and iron again.
Do the same for the jewels on the crown. Peach has a red one (I used dark pink) in the middle, then blue ones to either side. For a full crown, the jewels would just switch between red and blue. I only needed three; one for each prong.
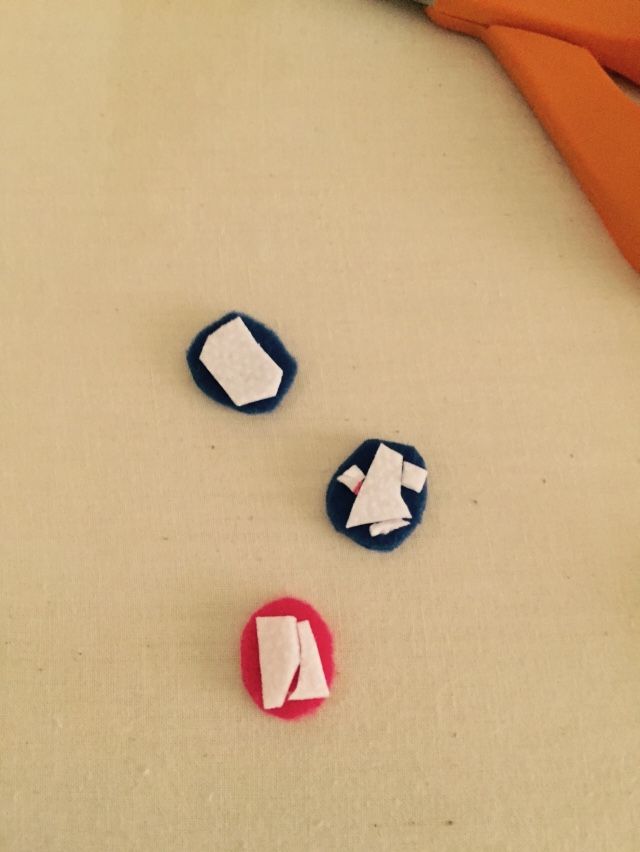
(I wanted to use up my scraps.)
Put the adhesive side down on the crown.
Iron with damp buffer cloth. Flip over, and iron again. And then you're all done!
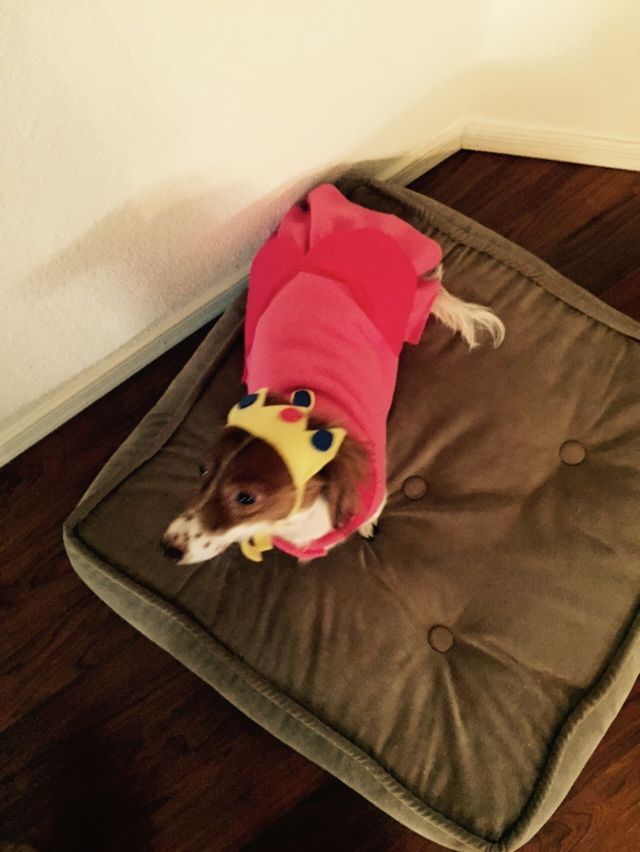

This was a VERY easy project. It took about an hour, or an hour and a half, from start to finish. The fleece made it super easy to cut and sew pieces together. The hardest part was getting Friday to stay still long enough to try it on!
Maybe now I'll have to make Mr. Smith Bowser. Hmmm...
~Buttons