Thursday, May 28, 2015

Harry Potter Wands and Robe

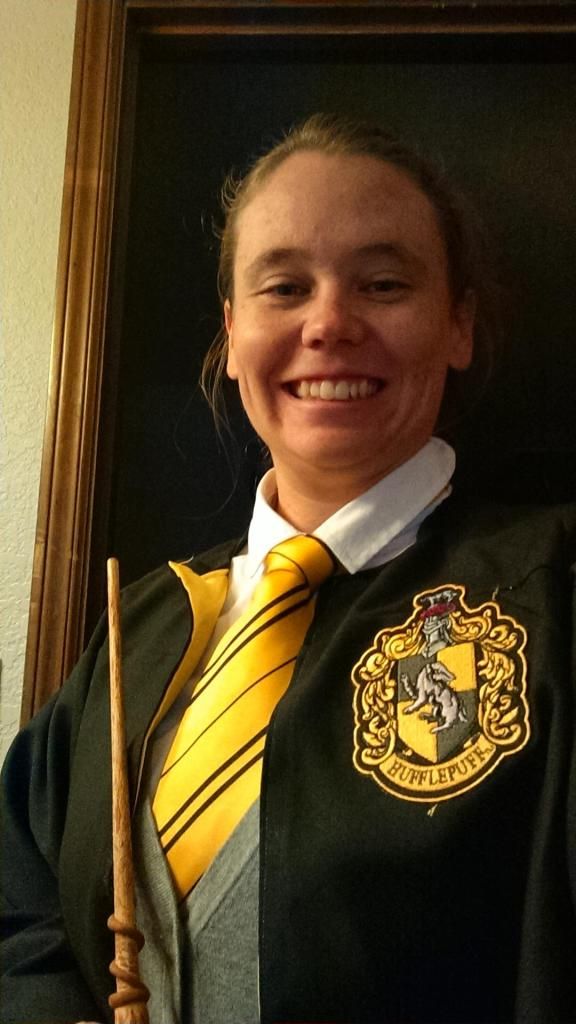
This is actually from last year's Halloween, when Pockets wanted to make her Hufflepuff outfit.  But since we are using them for our Comicon outfits this week, I felt it a good idea to post this as well!

The wands:

Pockets found this tutorial on Pinterest, and we followed it.
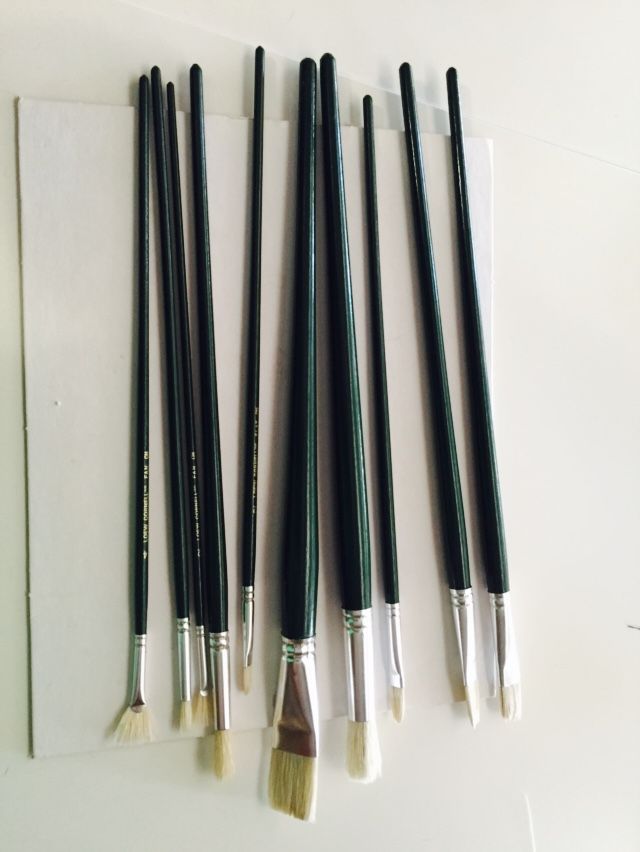
Materials:
Paintbrushes
Clay
More paintbrushes
Paint

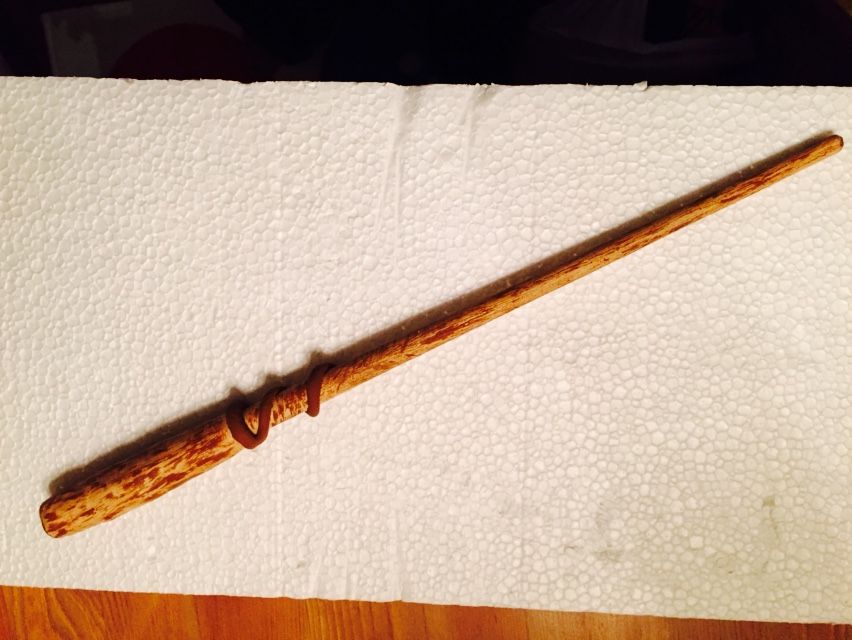
First, decide on a paintbrush to fit your needs.  Pockets used a medium sized one, but since my wand is "slightly springy" I used a smaller, more dainty paintbrush.

FAFE2C20-A5C7-45D2-B9D0-5678F371D47D_zps


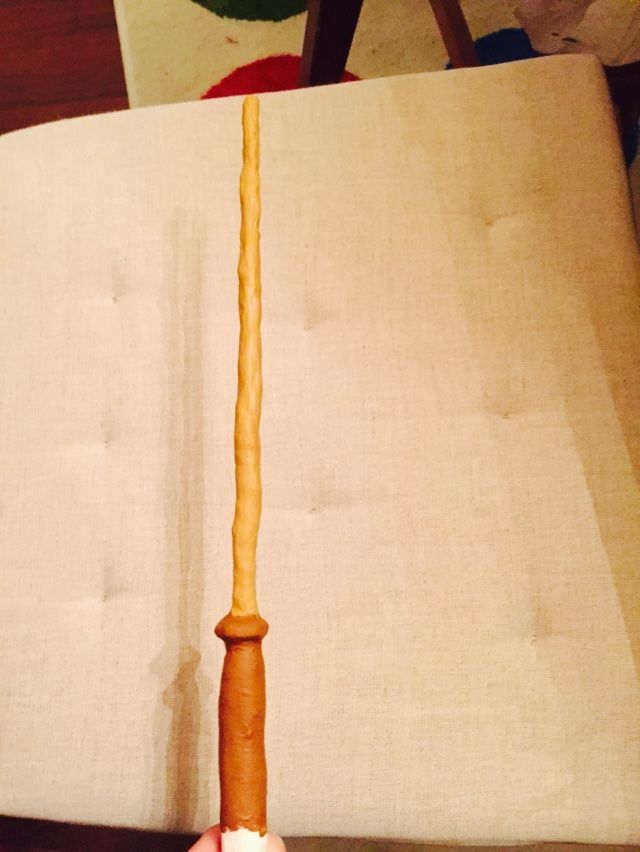
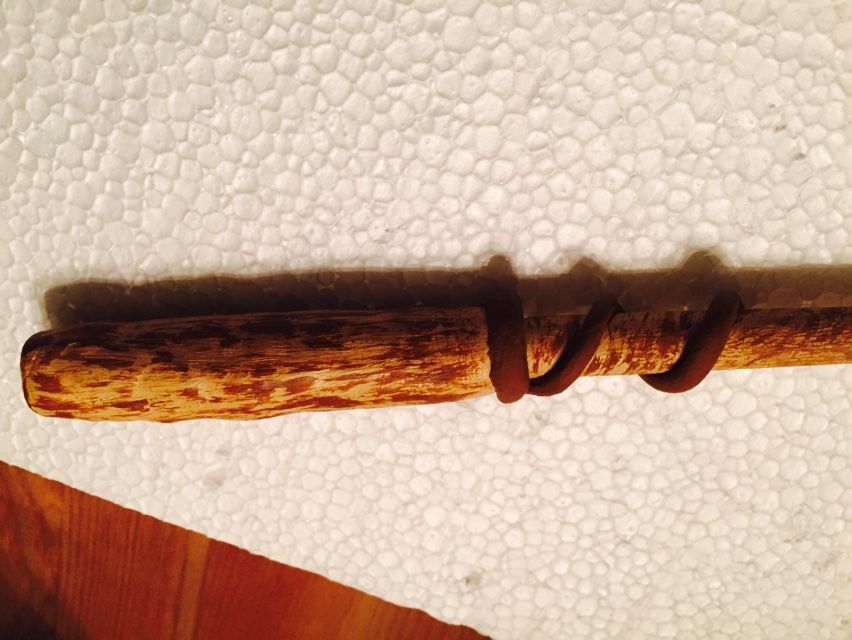
Start by covering the bristle in clay; this will be the wand's handle.

FF2C86B9-8274-44C6-9C33-16C2DBAE8029_zps

ADB502A3-EB67-4F0F-8A8D-961DF559342F_zps
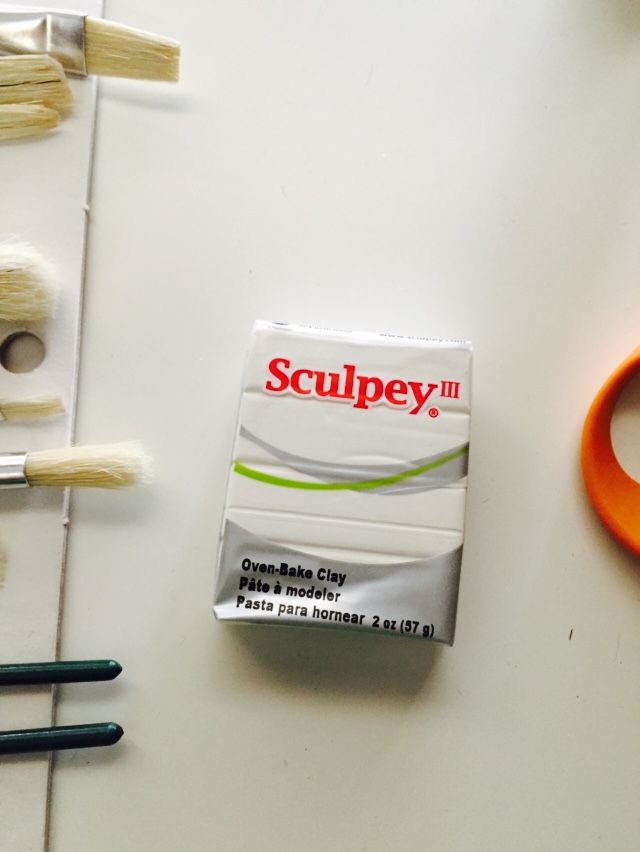
(this is the clay we used)

Next, use the clay as you desire to shape your wand.  I wanted mine (made of hawthorne) to be woody and knotty.  Pockets went with a smooth, but decorative style.

873B4982-689E-4D15-BB09-D150BDDA6373_zps

Next bake it.  The directions we used said 10 minutes for every 1/4 inch thickness.  Ours were about 1/2 an inch, so we cooked them for 20 minutes.

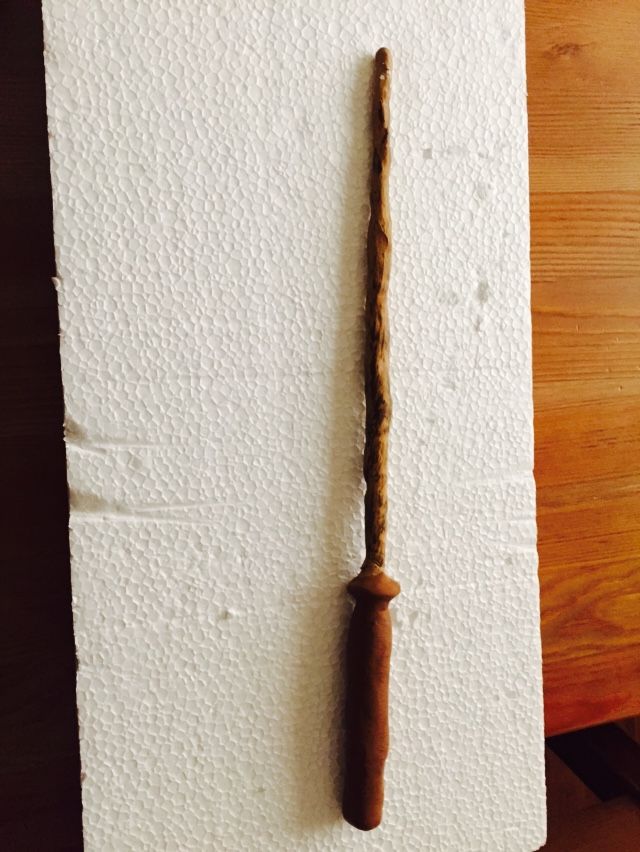
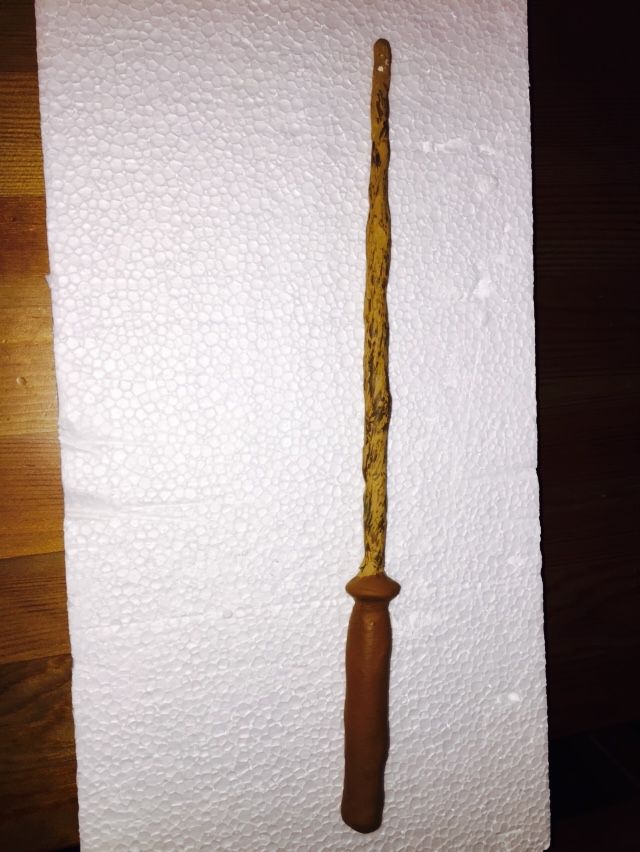
Then we painted them.  We had three shades of brown, and a white to mix them with.  Pockets did hers lighter than mine.  I decided to paint my handle a darker color too.

0512FD73-B12A-44AF-B630-FE842F8CEEA7_zps

Pockets added a darker wood grain onto her wand, and then painted the swirl that went up from the handle.

8EE98F78-6246-45A3-87A9-E4CD0828957A_zps

1E1F5ED6-E2D1-4A5F-9F94-A3DC586A4674_zps

F714C73A-36D9-4426-8737-11F44949A780_zps

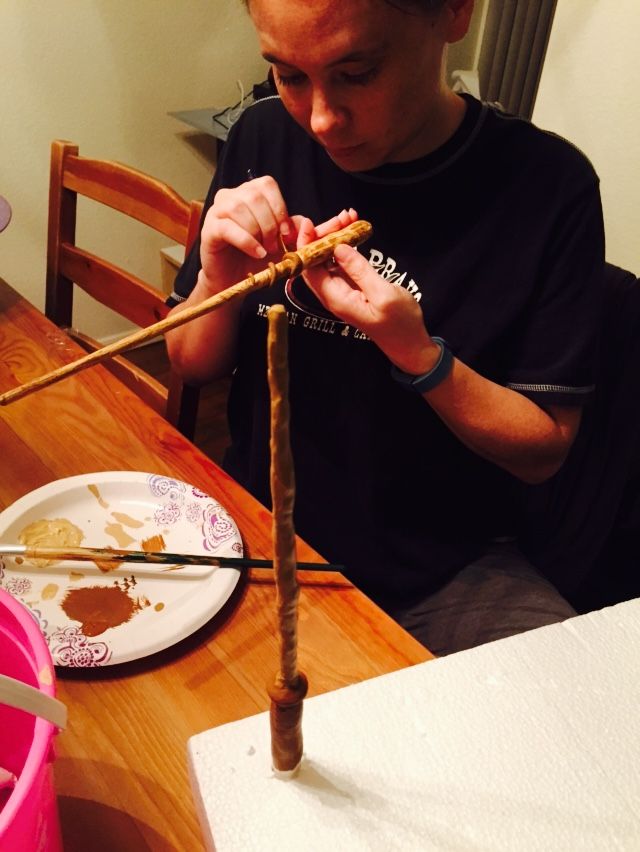
Since her's looked so awesome, I added wood grain onto mine as well.

8C482C19-A6D0-40E9-83F0-42329A4B1C24_zps

8FA34425-A693-4EC9-8C0F-501FE2AD2A7F_zps


The robes:

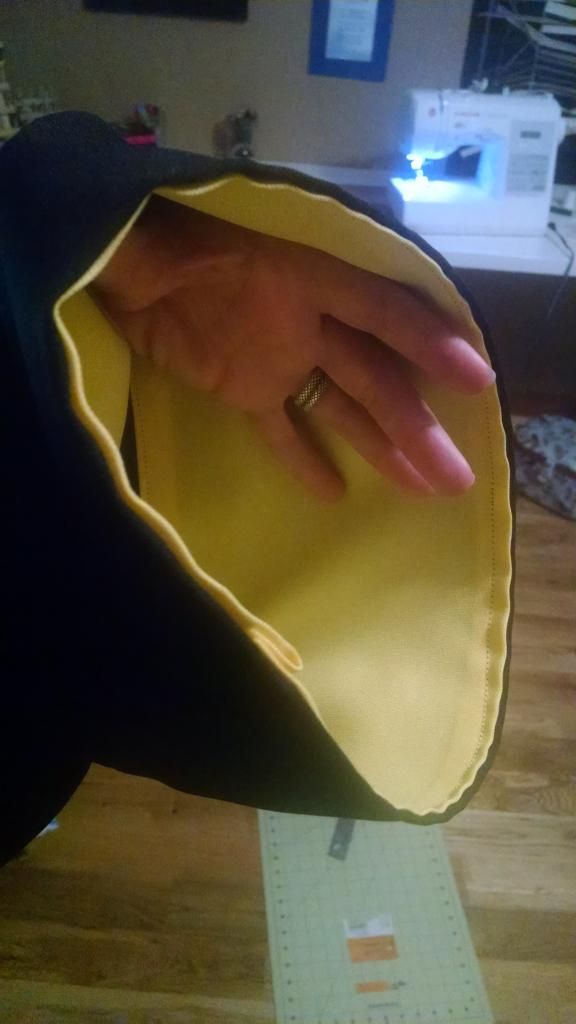
For the robes, we used Simplicity pattern 5840.  For fabric, Pockets chose a beautiful black poplin.  It was so easy to work with, and super heavy, for that robe-like look and feel.  She used a light yellow poplin for a faux lining.

The first attempt, just doing as the pattern said, turned out HUGE.

F3C254AD-FC63-4030-8F0E-AA3CD5FAAE37_zps

2EBB4B98-DAEE-4A6E-97EC-49596260DCF4_zps

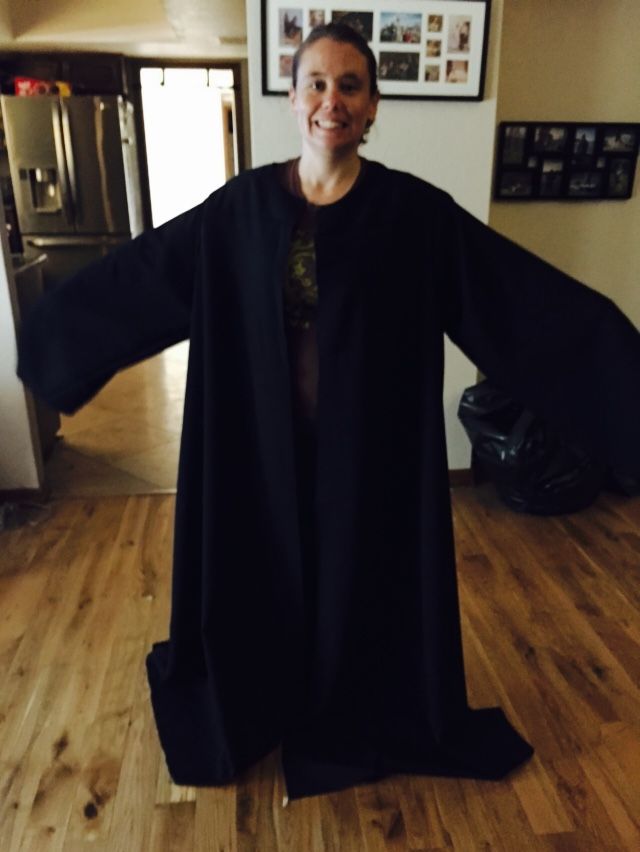
It fit her boyfriend better.

E6F7790D-4C76-454E-9550-0FC6C0B068F5_zps

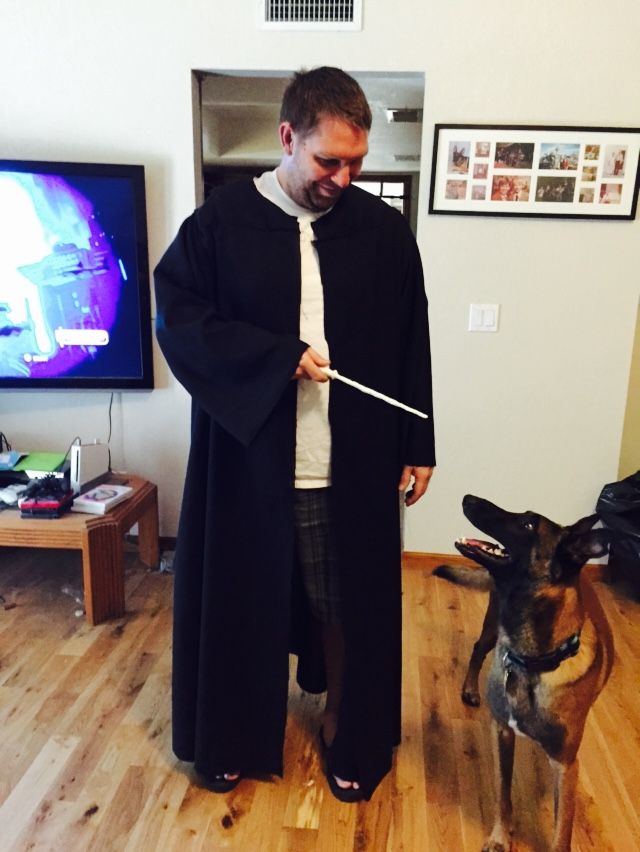
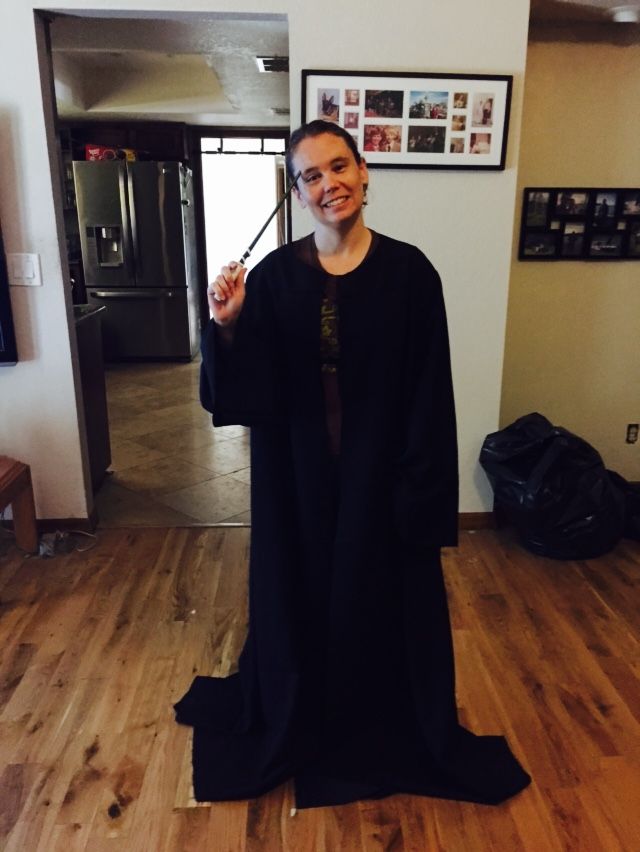
So he got those robes (he's a Gryffindor), and Pockets made a new set for herself, shrinking the pattern an inch in every dimension.

She paired it with a gray skirt, white button up blouse, gray cardigan, a Hufflepuff tie, and a House badge.  It turned out SO CUTE!!

D8EF94CA-FE07-483B-8B3F-B4268148A85D_zps
(A Hufflepuff wearing an Aes Sedai ring???)

E8728CFE-51B3-47D9-A24A-57092B97FE87_zps

C7328C19-17B0-4E42-8F62-1860D30B828B_zps

And for the whole effect (but through a mirror):

5B941F82-3D18-4333-8E44-0D6F3CD08EAD_zps


Now we're all set for Comicon!


~Buttons

DIY Ravenclaw Uniform

Or, how to make a long sleeved shirt into a sleeveless shirt.

Or, how to make a shirt smaller.


I had many reasons for altering this shirt, as the various titles of the thread suggest.  For the Phoenix Comicon this week, Pockets and I are dressing up in various costumes.  Pockets already had a Hufflepuff outfit from Halloween last year, so I had to come up with making a Ravenclaw one for myself.

First I ordered a Ravenclaw iron on patch from Amazon.  I was very happy to find one in bronze and blue (which is the book canon) rather than the silver and blue (which is the movie canon).  I wanted to be book canon.

With that in mind, I had to find a tie.  Any online are from the movie, so that wouldn't work.  I had to look the old fashioned way and buy one at a department store.  I searched online and found one that looked good at JC Penneys.  I went to the store--with my patch--and it looked pretty good together.  I got it on clearance, $15!

Now I just needed a white button up shirt and a gray cardigan.  Urged by my husband to save some money, I went to Goodwill to see what they had.  First off, I was impressed that everything was grouped by color; that made looking so much easier!  I found a white shirt for $5, but it was an XL--way too big.  I got it anyway.  And I found dark gray (almost charcoal) cardigan for $10.  Lucky!

So, for the shirt, it's ginormous!

8B587B1B-BCB2-4B2A-A9F3-65D8B0D36B16_zps

E9BAE696-3466-4F74-AD62-0CCB2BF00A38_zps

And it's really hot here, so I figured it might be best to cut down on the materials I'd be wearing.  So I decided to make it sleeveless.

I cut off the sleeves, right below the seam.  This shirt is a very fancy material and it cut beautifully and has no need for heming the cut.

3A70FB97-A879-4DF9-8608-E331282733E4_zps

Next, I put it on inside out and pinned how much I needed to take in the sides.  It's about a inch and a half on either side.

691AED9A-A4F6-4926-9192-B17BC8ACDFD1_zps

DFD734E5-5698-4C6C-8330-9C208423B415_zps

There was still too much fabric in my chest area, so I decided to try a dart.  I've never done darts before and it looked easy enough.  I put the shirt on inside out again, and pinned how much fabric I wanted to take away.

D4DA7404-8B66-463B-A065-F493AB2E3FFD_zps

It turned out decent.  Not the best ever, but definitely an improvement!

CB4A9CC9-9616-45FC-9D59-73AA62165F97_zps


Now, for my cardigan, all I had to do was iron on my patch!

FD8A05BF-624E-4B45-AE8A-DA06549D68B6_zps


And here's the whole outfit!

81BBB6C9-BD06-4E20-9DA7-29D73251B30E_zps

A57EB97E-E543-402B-8D3F-B5BE52C15675_zps


This will be our outfits for Friday.  I'm so excited!


~Buttons

Saturday, May 9, 2015

Apron Skirt

Posted Today, 04:16 PM
d.JPG

I found a tutorial on Pinterest for this skirt.  I loved it the moment I saw it.  And it's pretty simple to complete.  I had a couple of hiccups, but that was due to my backwards thinking--or maybe lack of backwards thinking. 

First, I found two fabrics that looked okay together.

2C2AF5CC-5FDA-4F09-B60E-2CE21369FCB9_zps

I had bought the pink polka dot fabric from the remnants bin at Hobby Lobby last week.  I didn't have anything in mind for it; I just liked it.  Plus, it was only about $2.50.  How could I pass that up?  The blue buttons fabric Pockets bought for me quite a while ago.  I had planned on turning it into pajamas, because it's flannel.  

First, measure your waist.  The top of each piece of fabric will be this length.  I added 1 inch to mine, just to ensure it would fit.

For the bottom length, my fabric was only about 50 inches because it was a remnant.  But you can make it as wide as you want.  I believe the original tutorial just doubled the waist measurement.  It's totally up to you!

I cut out my polka dot fabric, then placed it on top of my button fabric and traced, giving me two equal-sized pieces.

After that, I sewed bias tape on the TOP hem of the button fabric.

9574BD8D-4F0B-493B-BD7D-04FF4944C6FF_zps

Then, I sewed the bias tape to the TOP hem of the polka dot fabric, including about 8 inches extra bias tape on each side to use as strings.

276EEAD2-5F8C-4135-A516-D59E40428FA9_zps

Since the pink fabric was a bit see-through, I added in a small white cotton panel for modesty.

16A35C5E-819A-4306-ACEE-FFCA48AB2CAC_zps

With both fabrics on top of each other, right side to right side, sew up the angled side seams.

FAFE9452-D6B2-4857-9AC7-0A00B6EB9CB9_zps

Note: Do not sew all the way up to the bias tape because the skirt will be flipped inside out, and you need the strings on the outside.  So, stop at the top bias tape; it will be finished later.

9143647E-7D02-42A5-BCA8-1B3AECCD8E3A_zps

9FE9763F-761D-406A-9443-CEE0A8E61893_zps

Some of the readers of the original tutorial pointed out that the skirt will slip open and suggested extra reinforcement.  I decided to sew the top seam, leaving just enough room open for my waist.  I used pins to mark the sides of my waist.

1197585B-5CEA-424B-A07A-D2764AD7CBD7_zps

Before sewing, flip the skirt so it's wrong side to wrong side.  I accidentally sewed it right side to right side, and trapped my strings inside.  Also, once it's wrong side to wrong side, you can complete the side hem, tucking the other fabric under the fabric with strings.

But this is what it will look like if you leave the opening.

8A30FB20-6AB2-410F-A870-7D9FCFBA20F4_zps

I also added a small strip of Velcro (and I may have to change it to a snap or a button and button hole) to keep the skirt secure around my waist.  

FEFFBE3E-9E01-4BC9-8124-DC1873E4F78C_zps

Then, sew your bias tape to the bottom hem.  And you're all done!  Here it is after I fixed all the mistakes on the top seam.

7B6978AB-C6CE-4935-B0D1-4424C84BAF42_zps

FF96048F-D457-4B88-8EA8-EE759BFAE920_zps

I love that it's reversible!  It's so adorably cute!

16E293CD-A208-485D-8FF6-774B89C4CE46_zps

E93253A4-B516-41D7-A9CB-D000178658CB_zps

CA40EC28-1FD8-4D27-8502-3BD11DB32444_zps

2CC45C94-6354-4134-B6BC-3FE8085636B5_zps

I think I like the buttons on the outside best.  


And just for fun... my doggie thinks fabrics are his bed...

BD06736E-E6DA-47E9-B5F7-9B3BEBF2E833_zps


~Buttons