Saturday, March 25, 2017

Custom Iron-On Designs

I've had an idea for doing an iron-on project since I saw this shirt at the mall.
 

My dachshund's name is Friday--named after the Cary Grant film His Girl Friday, not the day of the week--and I somehow resisted buying this.  I still regret it to this day!

So, Pockets and I got together to do some iron-on crafts.

I wanted nice, big letters like in the original shirt, but couldn't find any that looked decent.  I wound up with tiny letters.  Also, I wanted to have a dachshund on the shirt.  Of course, no dachshund iron-on patches.  Ugh.

Finally, I decided to make my own dachshund patch.  I bought one of the iron-on sheets, which are amazing for custom work!  I found a picture of a long-haired dachshund and drew it onto the back of the sheet.  (I went with a chevron design because it was the cutest they had available.... The selection was not that great.)


Next, I played with the layout.


I finally settled on this one.


Then I used the left over sheet to cut out two hearts for the sleeves.


~Buttons

Rand al'Thor, the Dragon, shirt


My favorite book series is The Wheel of Time, written by Robert Jordan, and finished by Brandon Sanderson.  The world, the characters, the magic, all are amazingly well-developed and fascinating.  It's truly epic in scope, as well as its themes.

The main character is Rand al'Thor, who begins as a shepherd, but in true fantasy fashion, winds up as a king.  I've been wanting to do a casual cosplay outfit for Rand since I saw this awesome red shirt at Goodwill.


I had recently done an iron-on (and as I go to link to it, I realize I haven't posted it yet.... it'll be coming soon) and I was surprised how easy it was to work with an iron-on sheet.  I thought it would be the best way to get some regal looking designs and dragons onto this shirt.  So I went to Joann and bought the Tulip gold Metallics sheet for less than $5.


The first thing I did was print out the dragon chapter icon used in The Wheel of Time onto cardstock.


I painstakingly cut it out.


Then I traced it onto the back of the gold sheet.


And painstakingly cut it out.


I actually did this twice, with a dragon facing left and a dragon facing right.  Next, I needed the kingly embellishment.  I looked at an official source for that:

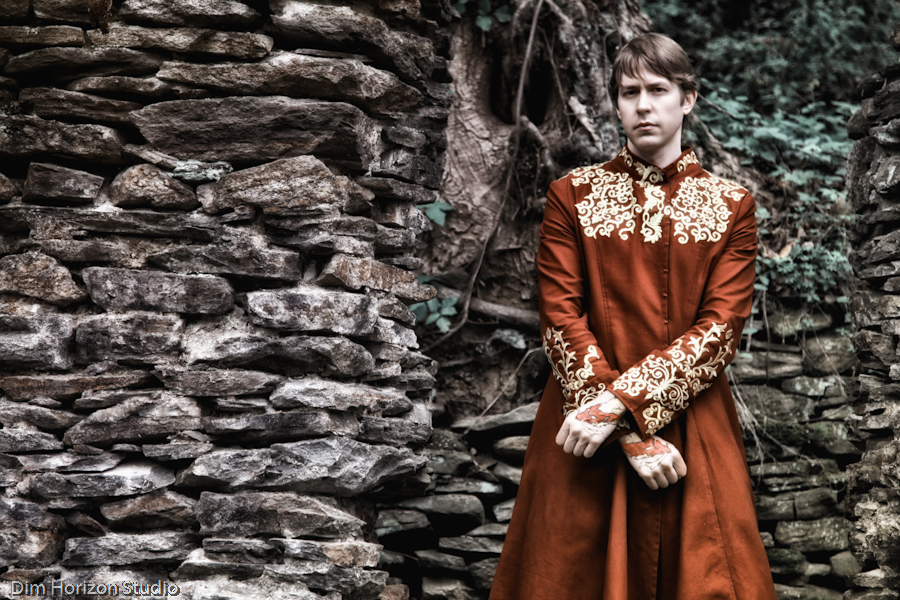
Paul Bielaczyc's Rand al'Thor costume
Paul's costume has a bunch of swirls that decorate the top and sleeves.  Well, I had to put the dragons on my sleeves, so I wanted to add the swirls just to the neckline.  I copied the top part of one of Paul's swirls, then made a smaller, less fancy swirl for filler.


I cut them out on cardstock and traced them onto the back of the gold sheet.


After I got them all cut out, I toyed with the layout.  Eventually, I decided on this.


This iron-on stuff is SO simple!  Place face up on the fabric,


Cover with a cotton cloth (or other piece of fabric),


And iron for 40 seconds.


Repeat with all the remaining pieces and you get this:


Next, I ironed on the dragons, making sure they faced the front.


I paired the finished shirt with this adorable gold crown (once again, he's a king!) that I bought at Charlotte Russe for $6.


Then I wore it to school the next day!


I am so in love with it!


~Buttons

Friday, February 24, 2017

Victor Nikiforov Flower Crown and Shirt

I'm crazy for the anime Yuri on Ice.  As I've probably said a million times already.  My love for this show--and so many of the characters--has no bounds.

Recently, I'm trying to get into causal cosplay.  It's a great way to relieve stress and anxiety at work.  A simple reminder that I'm in an outfit inspired by a show/book/movie I like does wonders for my mental health.

A few weeks ago, I accidentally got a stain on a cream colored shirt.  Since the shirt was ruined anyway, I had an idea to morph it into a Victor Nikiforov casual cosplay design.


Victor wears this outfit at a competition and it's beautiful!  I wanted to try to use this as inspiration for a casual shirt that I could wear to work.


I have experimented with using gel glue with bleach to get a design on a shirt, so I researched to see if it was possible with dying too.  In theory, it works.  So I took my white shirt, and used gel glue to etch out "feather" like shapes along the front of the shirt, sloping down to the left armpit.


At the top left, I did the inverse: I colored in the diamonds to remain white and left the connecting sections open to be dyed.


I used "denim blue" dye because it was what I had on hand.


You can see how the gel glue is holding strong!

The color looked so dark, so I freaked out and pulled it from soaking after ten minutes.  I bet the color would have turned out a lot brighter if I'd pushed through that fear and just trusted the package directions.

Now, with my adorable shirt ready, I HAD to have Victor's flower crown, or something similar.

I used blue clay to craft seven tiny roses.  I followed a tutorial on Pinterest, but my flowers still turned out kinda crappy. 


They were too big to turn into a necklace, so I figured a headband would hold them pretty well.  I hot glued them to a blue headband, and then added white beads in between.


And here's the final result:


I paired it with two bracelets: one blue and white snowflakes to represent Victor's Russian snow.  The second was a blue piglet--of course to represent Victor's love for his kobuta-chan, Katsuki Yuri!


~Buttons

Sunday, February 19, 2017

Scooby Doo Dress

We had Spirit Week at the elementary school where I work.  For movie star day, my coworkers and I discussed possible group ideas.  We settled on Scooby Doo.  I was Velma, so I wore an assortment of orange articles of clothing--even dying a pair of stockings red/orange.

But one of my coworkers asked if I could construct a Scooby Doo dress out of fleece.  I still have a ton of fleece left in my fabric stock, so I looked to see what I could do.

I only had scraps of this brownish color, so I had to get creative with my cutting.  Using a shirt as a pattern, I cut a front and back based on this shape.


I sewed them together, right side to right side, leaving openings at the neck, arms, and bottom hem.

From there, I used the rest of the fabric to cut out two skirt panels, both slightly wider than the bottom hem of the shirt.  I sewed the two panels together along both sides, then gathered the top to match the width of the shirt.  I sewed them together, right side to right side.  Very, very easy.


Next, I took black fleece and cut out Scooby Doo spots.  In canon, he has two spots on each shoulder, and a long spot along his back.  I tired to mimic this.


Finally, I used blue fleece to cut a belt, and added on a SD tag.


My coworker decided to wear the belt as a collar instead.  It looked so cute!


~Buttons

Sailor Moon Crescent Wand

In January, I was so excited to hear that the Sailor Moon R Movie was being released in theaters.  A friend and I bought tickets to see the Japanese subtitled version.

I wore my Sailor Moon casual cosplay outfit, but I wanted more accessories to go with it.  I must have gotten ride of my original Moon Rod (why did I do that!?!) so I decided to try my hand at crafting one of clay.

I started with a metal skewer which I covered in aluminum foil.


Next, I made a crescent shape,


And a ball for the Imperium Silver Crystal.


I forced the skewer through the crescent,


Then impaled the crystal atop.


I covered the stick with pink clay.


Then I began to cover the crescent with yellow.  I ran out of yellow, so I filled the rest in with white.


I cooked it according to package directions.


Finally, I painted it all and added lines to the Silver Crystal.


It turned out hideous!  But I completed it in an afternoon and had it ready for the movie that night.  So, I was pretty pleased!  More clay would have solved my problems.  Now I know for next time.


~Buttons